
I’ve been kept away from cooking for too long. Between holiday traveling and moving, it’s been at least a month since I did any serious cooking or baking. Every time I have a cooking dry spell like this, I end up thinking of food constantly. I start to make lists of what I want to make. And it seems like the dish that occupies the most of my thoughts is always lasagna.
I love lasagna in all of its forms – meat, mushroom, spinach, artichoke, tomato, béchamel. This time I wanted to make a classic meat lasagna. I keep trying new recipes because I haven’t yet found one that I love. I decided it was high time to try Marcella Hazan’s recipe. I coveted Hazan’s Essentials of Classic Italian Cooking for several years before receiving it as a wedding gift from my sister-in-law. Yay! This is the first recipe I’ve made from it.
I’ve often heard about those lasagna recipes that take all day. Most modern recipes are trying to simplify and shorten the process, but I’ve always been curious about the original. If someone spends all day on a recipe, it must be worth it, right?
I was about to find out. Reading Hazan’s recipe for Baked Green Lasagne with Meat Sauce, Bolognese Style, was like the Choose Your Own Adventure books I read as a kid. Turn to page 129 for pasta made with the machine method, or page 143 for the hand-rolled method. On page 129, I was directed to page 89 for instructions on cooking the spinach. Yeesh. I took the recipe(s) one step at a time, and everything really did go without a hitch.
The recipe involves a lot of patience. Hazan is not much into modern tools that make life easier; she’s all about doing things the hard way. I’ve made béchamel sauce many times, always by melting butter, stirring in flour, whisking in cold milk, stirring until it boils. Hazan instructs this all to be done over low heat, and the milk is pre-heated, then added to the butter-flour mixture 2 tablespoons at a time. Then this mixture is stirred, of course constantly, over low heat until it thickens. Over low heat, it takes a long time to thicken. But once it does, it makes the smoothest béchamel sauce I’ve ever made, albeit one that tastes somewhat of raw flour.
The bolognese sauce is similar in that there’s a lot of “gentle simmering.” Hazan is very specific that the sauce must simmer for at least 3 hours after the tomatoes are added. What she fails to mention is that the recipe takes about an hour even before that point. One cup of milk takes quite some time to completely bubble away at a gentle simmer.
Of course the pasta dough could not be made in the food processor, it must be done by hand. I was determined to follow the recipe exactly, so I trudged on. And this is what I got…
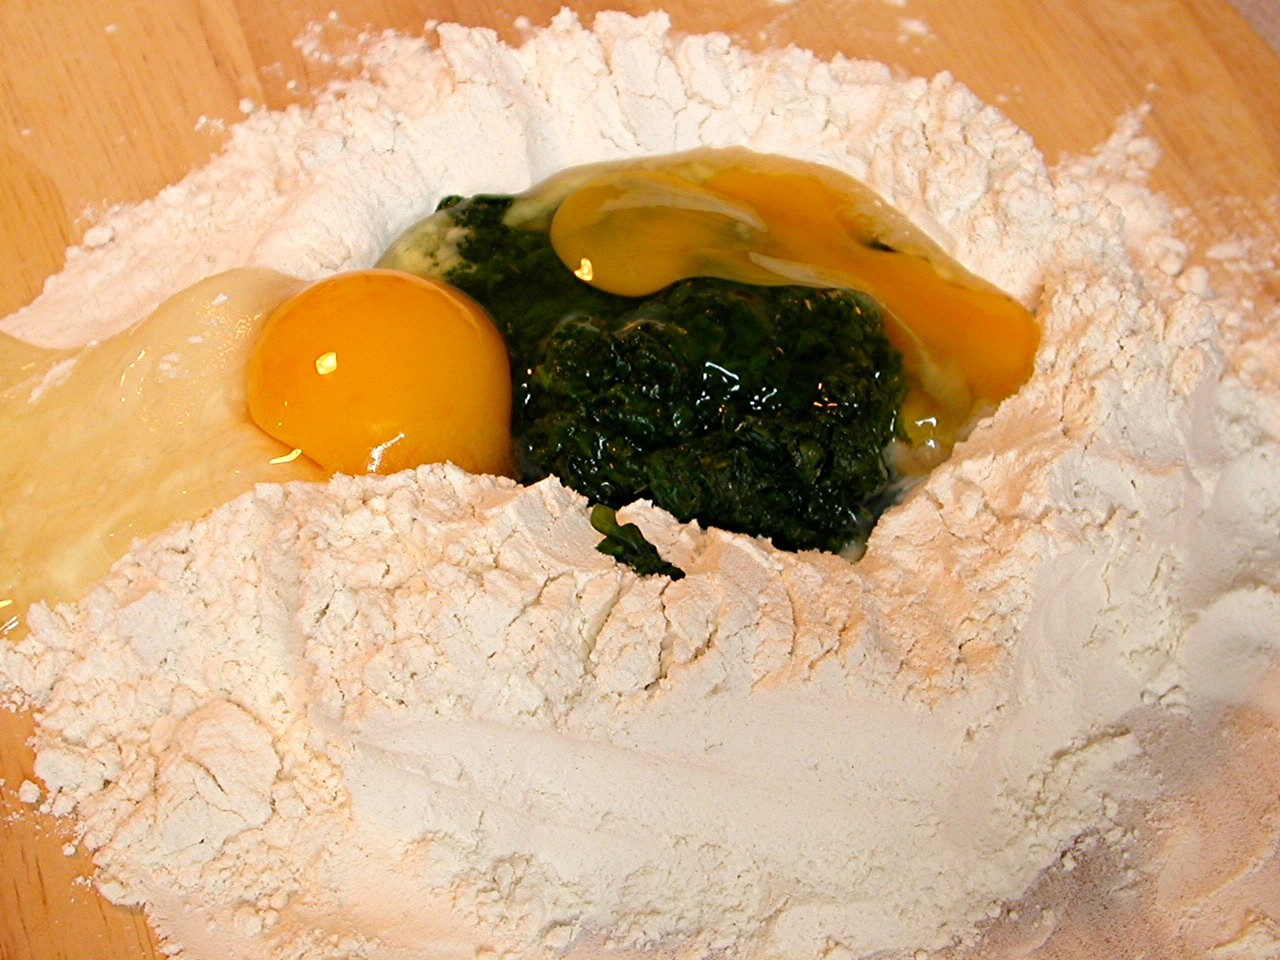
Obviously the egg is supposed to stay in the well in the center of the flour, not glop out a breach in the side. Next time I’ll mix the egg and spinach together in a bowl, even add some flour to it before I move to a flat work surface to complete the additions of flour.
This is the first time I’ve rolled out pasta without wanting to scream! Really, rolling out the pasta just went splendidly, and I’m so glad that I finally learned a good technique for this.

The two sauces are mixed together and alternately layered with pasta. Hazan specifies that there should be at least 6 layers. I lost count, but I know I had more than that, and I only used probably 2/3 of the pasta sheets before I ran out of sauce.

All in all, the lasagna took about 7 hours, keeping in mind that I was taking my time. Was the recipe worth all this? Well…the short answer is no. It was good, but not that good. Dave and I agreed that it tasted somewhat meatloaf-ish. The long answer is that I was fairly certain going in that there would be things I’d want to change in the recipe for later editions. For one thing, the only cheese in the entire recipe is 2/3 cup of parmesan. I gather (from wikipedia) that this is the traditional Bolognese method for lasagna. But I’m an all-American girl, and I want mozzarella! I’d also like less carrot and celery to counteract the “meatloafness”, and more onion. I want to try adding some flavorings to the béchamel as well.
So I will be attempting this recipe again, but probably in a less authentic Italian form. I trust that it will go much faster now that I understand the methods involved. If nothing else, I’m grateful to have learned how to roll out homemade pasta to the thinnest setting without any swearing.
I’m typing out the whole recipe for you below, so you can see for yourself the pickiness that is a Marcella Hazan recipe. I followed the recipe just about exactly.
Baked Green Lasagne with Meat Sauce, Bolognese Style
Serves 6
Bolognese Sauce
Béchamel Sauce
Green pasta dough
1 tablespoon salt
2 tablespoons butter, plus more for greasing a 9- by 12-inch bake-and-serve lasagna pan, no less than 2½ inches high
2/3 cup fresh grated parmigiano-reggiano cheese
1. Prepare the meat sauce and set aside.
2. Prepare the béchamel, keeping it rather runny, somewhat like sour cream. When done, keep it warm in the upper half of a double boiler, with the heat turned to very low. If a film should form on top, just stir it when you are ready to use it.
3. Make green pasta dough. Roll it out as thin as it will come. Leave the strips as wide as they come from the rollers, and cut them into 10-inch lengths.
4. Set a bowl of cold water near the range, and lay some clean, dry cloth towels flat on a work counter. Bring 4 quarts of water to a rapid boil, add 1 tablespoon salt, and as the water returns to a boil, slip in 4 or 5 of the cut pasta strips. Cook very briefly, just seconds after the water returns to a boil after you dropped in the pasta. Retrieve the strips with a colander scoop of slotted spatula, and plunge them into the bowl of cold water. Pick up the strips, one at a time, rinse them under cold running water, and rub them delicately, as though you were doing fine hand laundry. Squeeze each strip very gently in your hands, then spread if flat on the towel to dry. When all the pasta is cooked in the manner, 4 or 5 strips at a time, and spread out to dry, pat it dry on top with another towel.
*Explanatory note: The washing, wringing, and drying of pasta for lasagna is something of a nuisance, but it is necessary. You first dip the partly cooked pasta into cold water to stop the cooking instantly. This is important because if lasagna pasta is not kept very firm at this stage it will become horribly mushy later when it is baked. And you must afterward rinse off the moist starch on its surface, or the dough will become glued to the towel on which it is laid out to dry, and tear when you are ready to use it.
5. Preheat the oven to 400 degrees.
6. Thickly smear the bottom of a lasagna pan with butter and about 1 tablespoon of béchamel. Line the bottom of the pan with a single layer of pasta strips, cutting them to fit the pan, edge to edge, allowing no more than ¼ inch for overlapping.
7. Combine the meat sauce and the béchamel and spread a thin coating of it on the pasta. Sprinkle on some grated parmesan, then add another layer of pasta, cutting it to fit as you did before. Repeat the procedure of spreading the sauce and béchamel mixture, then sprinkling with Parmesan. Use the trimmings of pasta dough to fill in gaps, if necessary. Build up to at least 6 layers of pasta. Leave yourself enough sauce to spread very thinly over the topmost layer. Sprinkle with parmesan and dot with butter.
*Ahead-of-time note: The lasagna may be completed up to 2 days in advance up to this point. Refrigerate under tightly sealing plastic wrap.
8. Bake on the uppermost rack of the preheated oven until a light, golden crust formed on top. It should take between 10 and 15 minutes. If after the first few minutes you don’t see any sign of a crust beginning to form, turn up the oven another 50 to 75 degrees. Do not bake longer then 15 minutes altogether.
9. Remove from the oven and allow to settle for about 10 minutes, then serve at table directly from the pan.
Bolognese Sauce:
1 tablespoon oil
3 tablespoon butter
½ cup chopped onion
2/3 cup chopped celery
2/3 cup chopped carrot
3/4 pound ground beef chuck
salt
black pepper, ground fresh from the mill
1 cup whole milk
whole nutmeg
1 cup dry white wine
1½ cup canned imported Italian plum tomatoes, cut up, with their juice
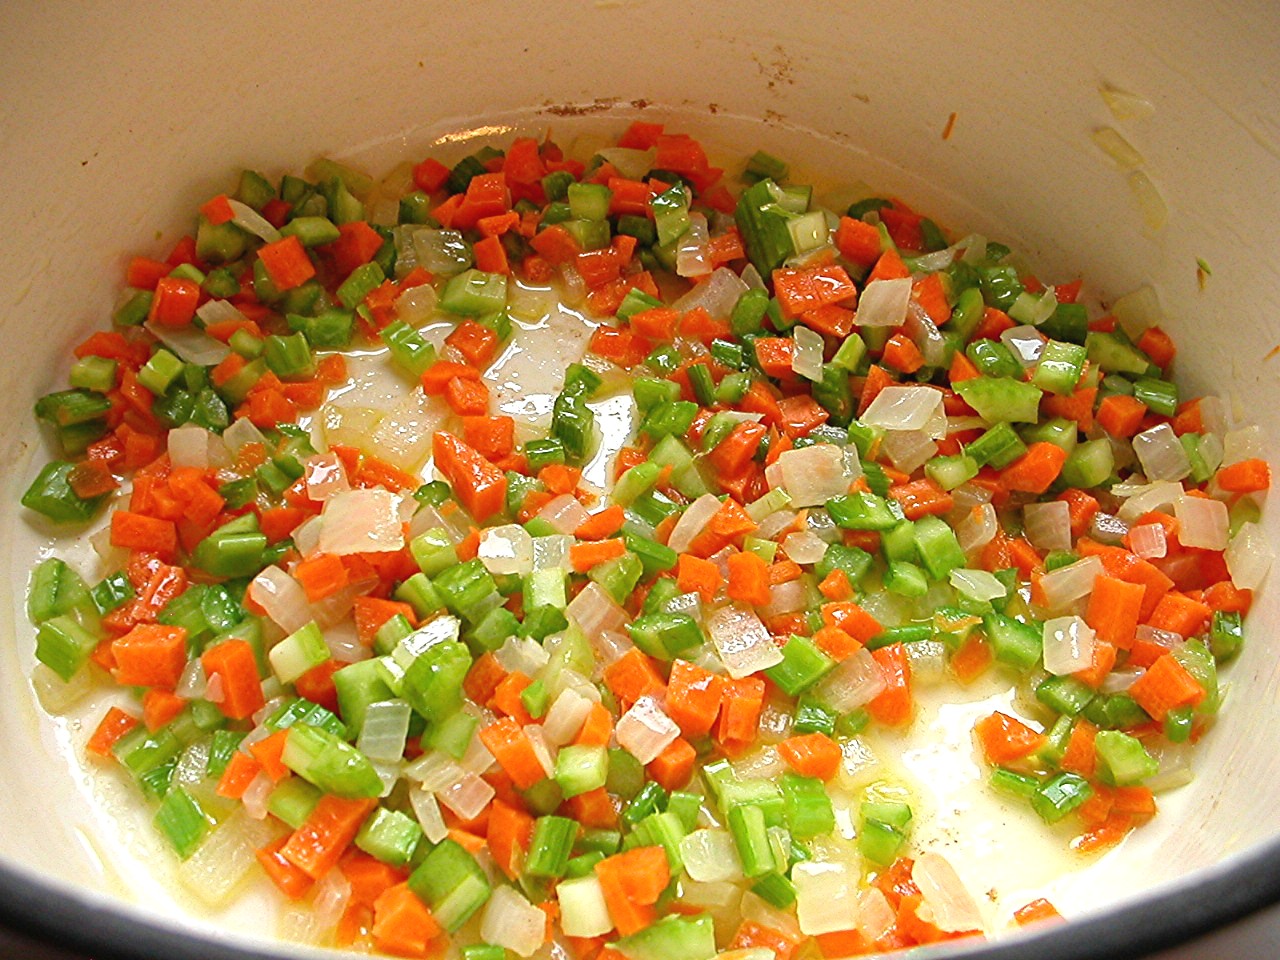
1. Put the oil, butter and onion in the pot, and turn the heat on to medium. Cook and stir the onion until is has become translucent, then add the chopped celery and carrot. Cook for about 2 minutes, stirring the vegetables to coat them well.
2. Add the ground beef, a large pinch of salt, & a few grindings of pepper. Crumble the meat with a fork and cook until beef has lost its raw, red color.
3. Add the milk and let simmer gently, stirring frequently, until it has bubbled away completely. Add a tiny grating – about 1/8 teaspoon – of nutmeg and stir.
4. Add the wine, let simmer until it has evaporated, then add the tomatoes and stir thoroughly to coat all ingredients well. When the tomatoes begin to bubble, turn the heat down so that the sauce cooks at the laziest of simmers, with just an intermittent bubble breaking through the surface. Cook, uncovered, for 3 hours or more, stirring from time to time. While the sauce is stirring, you are likely to find that it begins to dry out and the fat separates from the meat. To keep it from sticking, continue the cooking, adding ½ cup of water whenever necessary. At the end, however, no water at all must be left and the fat must separate from the sauce. Taste and correct for salt.
Béchamel Sauce:
3 cups milk
6 tablespoons butter
4½ tablespoons flour
¼ teaspoon salt
1. Put the milk in a saucepan, turn the heat to medium-low, and bring the milk just to the verge of boiling, to the point when it begins to form a ring of small, pearly bubbles.
2. While heating the milk, put the butter in a heavy-bottomed, 4- to 6-cup saucepan, and turn the heat to low. When the butter has melted completely, add the flour and stirring it with a wooden spoon. Cook, while stirring constantly, for about 2 minutes. Do not allow flour to become colored. Remove from heat.
3. Add the hot milk to the flour-and-butter mixture, no more than 2 tablespoons of it at a time. Stir steadily and thoroughly. As soon as the first 2 tablespoons have been incorporated into the mixture, add 2 more, and continue to stir. Repeat this procedure until you have added ½ cup milk; you can now put in the rest of the milk ½ cup at a time, stirring steadfastly, until all the milk has been smoothly amalgamated with the flour and butter.
4. Place the pot over low heat, add the salt, and cook, stirring without interruption, until the sauce is as dense as thick cream. If you find any lumps forming, dissolve them by beating the sauce rapidly with a whisk.
Pasta:
6 ounces fresh spinach, cooked, or 1/3 package frozen leaf spinach
2 large eggs
1½ cups unbleached flour
Pour the flour onto a work surface, shape it into a mound, and scoop out a deep hollow in its center. Break the eggs and add the chopped spinach into the hollow.
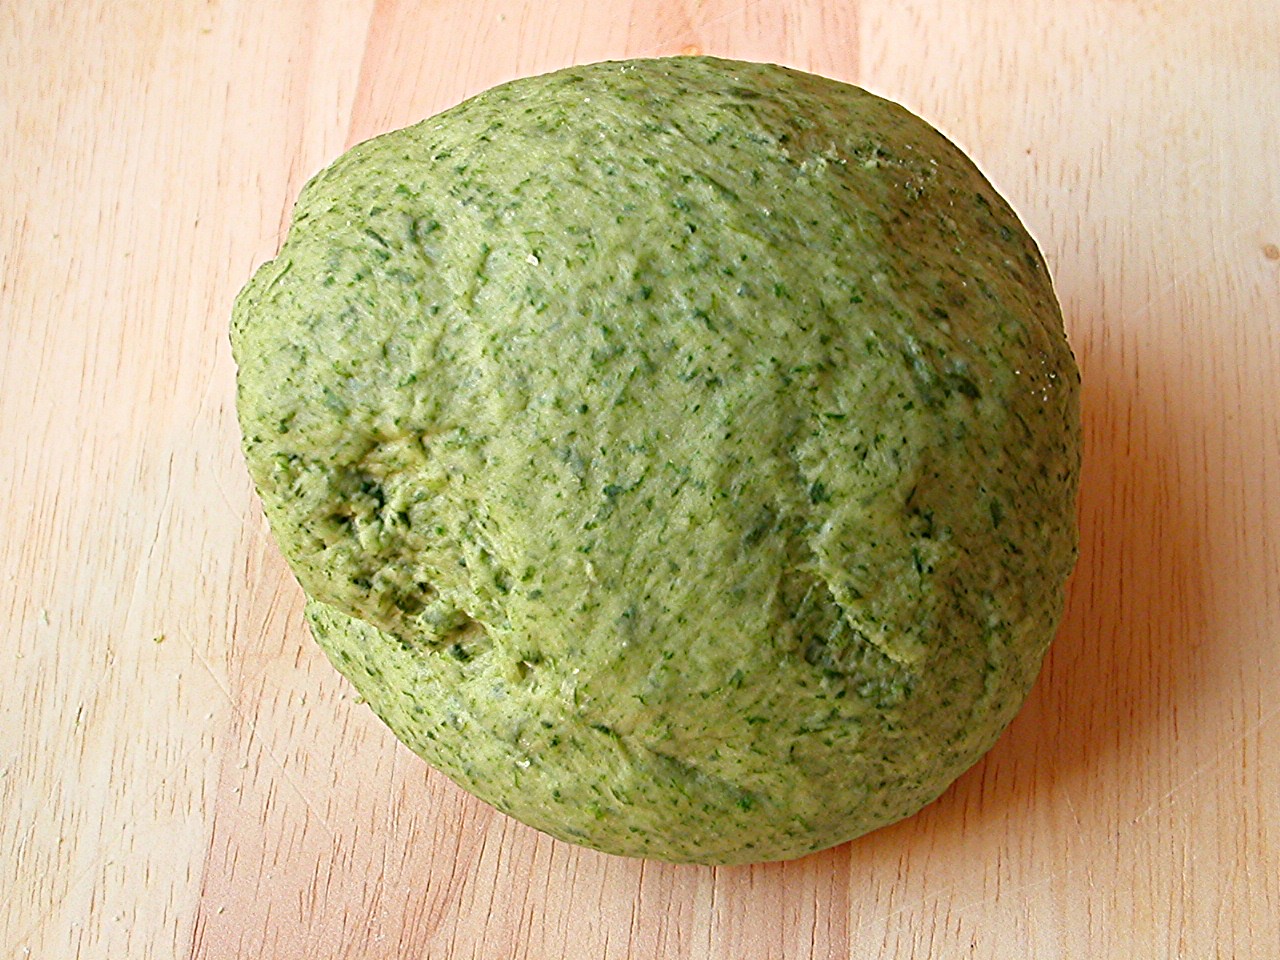
Beat the eggs and spinach lightly with a fork for about 2 minutes as though you were making an omelet. Draw some of the flour over the eggs, mixing it in with the fork a little at a time, until the eggs are no longer runny. Draw the sides of the mound together with your hands, but push some of the flour to one side, keeping it out of the way until you find you absolutely need it. Work the eggs and flour together, using your fingers and the palms of your hands, until you have a smoothly integrated mixture. If it is still moist, work in more flour.
When the mass feels good to you and you think it does not require any more flour, wash your hands, dry them, and run a simple test: Press you thumb deep into center of the mass; if it comes out clean, without any sticky matter on it, no more flour is needed. Put the egg and flour mass to one side, scrape the work surface absolutely clear of any loose or caked bits of flour and of any crumbs, and get ready to knead.
Return to the mass of flour and eggs. Push forward against it using the heel of your palm, keeping your fingers bent. Fold the mass in half, give it a half turn, press hard against it with the heel of your palm again, and repeat the operation. Make sure that you keep turning the ball of dough always in the same direction, either clockwise or counterclockwise, as you prefer. When you have kneaded it thus for 8 full minutes and the dough is as smooth as baby skin, it is ready for the machine.
Cut the ball of dough into 6 equal parts.
Spread clean, dry, cloth dish towels over a work counter near where you’ll be using the machine.
Set the pair of smooth cylinders, the thinning rollers, at the widest opening. Flatten one of the pieces of dough by pummeling it with your palm, and run it through the machine. Fold the dough twice into a third of its length, and feed it by its narrow end through the machine once again. Repeat the operation 2 or 3 times, then lay the flattened strip of pasta over a towel on the counter. Since you are going to have a lot of strips, start at one end of the counter, leaving for for the others.
Take another piece of dough, flatten it with your hand, and urn it through the machine exactly as described above. Lay the strip next to the previously thinned one on the towel, but do not allow them to touch or overlap, because they are still moist enough to stick to each other. Proceed to flatten all the remaining pieces in the same manner.
Close down the opening between the machine’s rollers by one notch. Take the first pasta strip you had flattened and run it once through the rollers, feeding it by its narrow end. Do not fold it, but spread it flat on the cloth towel, and move on to the next pasta strip in the sequence.
When all the pasta strips have gone through the narrower opening once, bring the rollers closer together by another notch, and run the strips of pasta through them once again, following the procedure described above. You will find the strips becoming longer, as they get thinner, and if there is not enough room to spread them out on the counter, you can let them hand over the edge. Continue thinning the strips in sequence, progressively closing down the opening between the rollers one notch at a time. This step-by-step thinning procedure, which commercial makers of fresh pasta greatly abbreviate or skip altogether, is responsible, along with proper kneading, for giving good pasta its body and structure.


