Feeds:
Posts
Comments

Archive for the ‘cake’ Category

copy-of-img_3207
Dave and I decided to walk 1000 miles this year. It works out to about 20 miles per week, just under 3 miles per day. It’s an ambitious goal, but not unattainable. The problem is, we’re way behind. By the end of February, we were already half a month’s worth of miles behind where we should have been. And since our work schedules prohibit us from catching up during the week, our only option is to do a whole lot of walking on the weekends. Which works out great, because I feel a lot better about having a big piece of blueberry cake for breakfast when I walk 7½ miles right afterward.

copy-of-img_3191

This crumb cake follows the same process as many layer cakes – the butter and sugar are creamed together, the eggs and vanilla are slowly added, then the dry ingredients and liquid ingredients are added alternately. It’s topped with a buttery sugary nut mixture before being baked.

copy-of-img_3202

I thought it was very good. I’m always a big fan of blueberries (and cake), and I liked the walnuts quite a bit. The crumb topping was an enjoyable crisp contrast to the tender cake. It was maybe just the tiniest bit too sweet for me, so I think next time, I’ll actually reduce the crumb topping by half. And since I have a lot of miles to make up still, next time could be very very soon. Sihan has posted the recipe.

One year ago: Chocolate Sandwich Cookies

copy-of-img_3214

copy-of-img_3208

Read Full Post »

copy-of-img_2446

While shopping for baking ingredients recently, I was inwardly complaining about recipes that call for a volume amount of ground nuts. I’ve never been able to find ground nuts in my well-stocked grocery store. That means that I have to grind my own, which is annoying because my food processor takes up basically my whole dishwasher, plus, if we’re going to have to grind our own nuts, shouldn’t the recipe indicate how much whole nuts we’ll need to grind to get the right amount of ground nuts? Blah blah blah, whine whine whine, and then I stumbled upon this:

copy-of-img_2258

Never mind! Let me tell you some things that don’t matter to me about buying these: 1) It’s probably far more expensive than grinding my own. 2) It’s going to take me months to use up a pound of ground almonds. Oh, and 3) these were the wrong type of nut for the recipe I bought them for. Whatever! Yay for not using the food processor!

copy-of-img_2436

With pre-ground nuts, this cake was really easy. I had a bit of a time crunch due to traveling, so I made it at my place Thursday night, then packed it in my suitcase the next day when I flew across the country. My sister and brother-in-law and I snacked on it the next night after putting my nephews to bed.

copy-of-img_2439

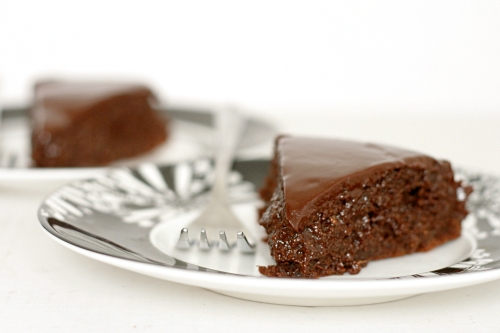
Dorie says twice in her introduction that the recipe is foolproof, so of course I had problems. Clearly the top of the cake is too dark, bordering on burned. I’m blaming my pyrex, instead of metal, loaf pan. I suppose I should lower the oven temperature 25 degrees when baking in pyrex. I didn’t want to serve the burned portion, so I trimmed it off before planning to add the glaze. Then I ate the trimmings and found them so tasty (and not burned-tasting at all) that I decided to skip the glaze altogether.

copy-of-img_2445

The cake was easy and delicious, sturdy enough to travel across the country with me, and was appropriate after dinner one night and for breakfast a few days later. Plus, I’ve now fairly well established that there’s a difference between baking in pyrex and metal that I’ll need to make adjustments for in the future. Altogether, a good Tuesdays with Dorie week for me. The recipe is posted on Liliana’s site.

One year ago: My first attempt at sushi rolls

copy-of-img_2493

Read Full Post »

copy-of-img_2303

Dave was watching a Cleveland Cavelier’s basketball game while I made this cake. When LeBron James, doing what LeBron James does, executed some crazy maneuver that only he could have pulled off, the announcers praised his creativity. Dave noted that for anyone else, the move would have been called stupid, but then for anyone else, the move wouldn’t have worked.

copy-of-copy-of-img_2260

Putting prunes in chocolate cake is basically the same thing. If it works, you’re creative. If not, you’re…something else.

copy-of-img_2265

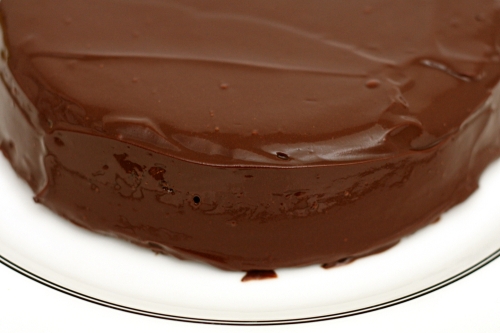
For this cake, prunes are chopped, softened in hot water, and flambéed.  The prunes are mixed with egg yolks, sugar, melted chocolate and butter, flour and ground nuts, and beaten egg whites. The cooled cake is topped with a rich chocolate glaze. Put this way, it sounds a lot simpler than over an hour of baking and at least six dirty bowls proved it to be.

copy-of-img_2290

Baking the cake is where I, and it seems a number of other people, ran into problems. Dorie instructs that the cake is done when the sides are pulling away from the pan, the top is crisp, and a knife inserted into the center is “streaky.” Hm…”streaky” isn’t very definitive. My cake seemed to pass all three of those conditions and even unmolded cleanly, but when I cut into it, I realized it was gooey in the center. A better indicator of doneness would be a final temperature to be reached, to be read with an instant-read thermometer.

copy-of-img_2293

Regardless, I hereby decree Dorie creative, and not crazy, because a gooey center could not detract from just how delicious this cake is. If I hadn’t known, I would not have been able to identify the prunes in the cake, and certainly not the whiskey. However, there was definitely something more to this cake than a regular chocolate cake. I have two-thirds of it left, and it’ll be a miracle if I get through the day without stealing tiny slices here and there. It’ll be a miracle if I get through the next hour, honestly. (I did not make it. It’s half an hour later and I’m eating cake. And I agree with Dorie that it’s better at room temperature, but it isn’t half-bad cold either.)

copy-of-img_2298

Lyb has the recipe posted. I used whiskey instead of Armagnac, prunes instead of raisins, and ground almonds instead of walnuts. I wouldn’t change anything about the ingredients, but if you make this, err on the side of less streaky on a knife inserted into the middle at the end of baking. This cake is so moist that I think it would be a challenge to dry it out.

One year ago: Raspberry Bars

copy-of-img_2309

Read Full Post »

copy-of-img_2027

You know what the best thing about this cake was? No worries about getting crumbs in the frosting!

copy-of-img_2016

But really the best thing was the rich chocolate cake layered with fluffy vanilla frosting, which pretty much sums up my favorite dessert. I used to get it all the time in college at my favorite dessert café.

copy-of-img_2013

I made one third of the cake recipe in pans large enough to hold one quarter of the recipe, because I heard that there was some problems with the cake not rising. My cakes seemed to rise okay. But clearly I need to wrap a wet towel around the pans or invest in the magic cake strips for these little pyrex pans, because I always end up with the weirdest shaped cakes when I use them.

copy-of-img_2018

I was supposed to cut the cake layers in half and crumble one of the layers, but with such domed tops that I’d have to cut off anyway, it seemed like a shame to crumble a whole layer in addition. Instead, I made my cake four layers instead of three and just used the crumbs from the evened out tops to decorate the outside.

copy-of-img_2019

I don’t have much experience with this marshmallowy type of frosting, but I really liked it with this cake. I love meringue anyway – I love the feel of all the little bubbles popping in my mouth. I added a pinch of salt to the frosting to cut the sweetness a little. Also, bonus – fat free frosting!

Altogether, this was a great cake. Stephanie, who chose this recipe for Tuesdays with Dorie, has the recipe posted.

copy-of-img_2030

Read Full Post »

copy-of-img_1985

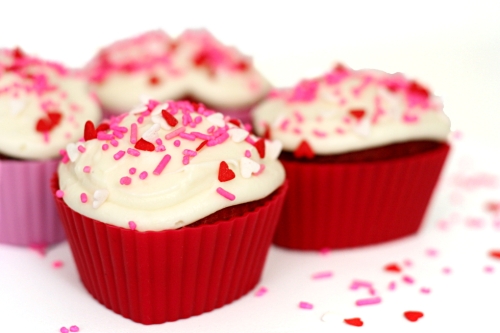
I started thinking about a Valentine’s Day blog post as soon as I pulled these heart-shaped silicone baking cups out of my Christmas stocking. And if you’re making heart-shaped cupcakes, they should be bright red. And if you’re making heart-shaped bright red cupcakes, they should be covered in heart-shaped pink and red sprinkles. My philosophy toward Valentine’s Day is, if you’re going to do it, overdo it.

copy-of-img_1789

What’s weird is that the closest I can remember to eating red velvet cake is these whoopie pies that I made a couple months ago. In fact, I didn’t even know that red velvet cake existed until college, when one of my professors told me a story about someone throwing it up on her carpet and the stain never coming out.

copy-of-img_1791

My lack of red velvet cake experience is even stranger considering that my mom was recently telling me about a great recipe that my grandmother has for it. My sister made that recipe recently and said it was a little dry, but she’s baking at high altitude, which makes cakes prone to problems. I wanted to give the recipe a try myself.
copy-of-img_1808

But Deb has a recipe she recommends as well, and I’ve had very good experiences with almost everything I’ve made from her site. And Kelsey describes herself as a red velvet cake enthusiast, and she recently found a recipe she loves. And Cooks Illustrated (via Cooks Country, their slightly less OCD magazine) has a recipe, and in general their stuff is worth trying.

copy-of-img_1797

Four recipes, all highly recommended from trusted sources. There was no good way for me to choose just one, so this seemed like a perfect opportunity to spend an entire evening baking something as simple as cupcakes do a recipe comparison.

copy-of-img_1803

Before I discuss detailed comparisons between each, let me cut to the chase and tell you that every single cake was really good, both in taste and texture. There were differences, but they were subtle. Dave and I had a hard time choosing favorites. That being said, once I ate enough cupcakes, preferences started to emerge.

In the discussion below, I will use the following abbreviations: SK for Smitten Kitchen; G for my grandmother’s recipe; AD for Apple a Day, and CC for Cooks Country.

copy-of-img_1810

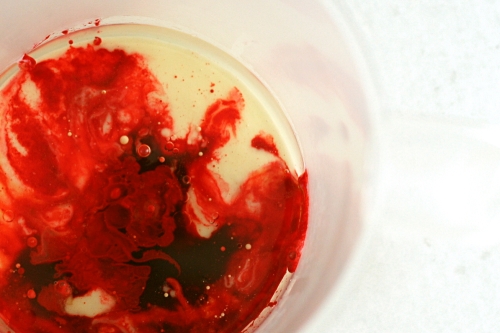
Effort: None of the cakes were exceptionally difficult. AD was the simplest – the dry and wet ingredients were mixed separately, then combined in the mixer. SK and G called for the vinegar and baking soda to be mixed together before being added to the already-mixed remaining ingredients, which I’d never seen before. And G and CC call for the cocoa and food coloring to be stirred into a paste initially, which Cooks Country explains is to distribute the cocoa more evenly.

copy-of-img_1907from left to right: SK, AD, G, CC

Color: While the shades of red vary, all of the cakes are definitely red. I have no preference. I should note that I used a little less food coloring in G and SK than the recipes called for, because I thought I was going to run out. Even so, I think their color is fine.

copy-of-img_1911from left to right: SK, AD, G, CC

Texture: While I wouldn’t call any of the cakes dry, G did seem less moist than the others. This isn’t surprising considering that it uses the least fat of these recipes and only a third of the fat of one of them (AD). AD and SK, both of which used oil as the fat, were perhaps a little moister than CC and G, which call for butter. None of the cakes were too dense, but SK and CC seemed especially fluffy. I was expecting a different texture in CC compared to the rest, because it was the only recipe that called for all-purpose instead of cake flour, but it wasn’t noticeable.

copy-of-img_1969

Taste: One thing that I think it important to note about Red Velvet cake, that Cooks Country clarifies in their article, is that it not meant to be a chocolate cake. The small amount of cocoa is just there to provide the red color. Unfortunately, CC’s cake was my least favorite. I think it’s because of one very small difference between their recipe and the others – the rest call for a teaspoon of salt, CC has just a pinch in it. The flavor of this cake was definitely muted compared to the others. The rest were all really good. SK calls for over twice as much cocoa as the others, which was enough so that I could actually taste a little chocolatiness. I like chocolate of course, but in this case, it masked that classic Red Velvet tanginess. AD and G tasted somewhat similar, but I think G had a little bit of a metallic taste to it (which I have no explanation for).

So, in the end, I choose AD (found through Kelsey’s Apple a Day and originally from Saveur) as my favorite, for its moistness, its bright, pinky red color, the ease with which it comes together, and especially its sweet but tangy flavor.
copy-of-img_1970
Update 2/15/09: When BMK pointed me in the direction of another oft-recommended Red Velvet cake recipe, I used amazing restraint in waiting a whole 6 hours before I tried it. The Pastry Queen’s recipe uses butter instead of oil as the fat, and it includes sour cream. Other than the sour cream and calling for both all-purpose and cake flour, the ingredient list was similar to the other recipes I tried.

copy-of-img_2003top – Pastry Queen; bottom – Apple a Day

I generally prefer butter over oil in desserts, and I think sour cream makes cakes really tender, so I was pre-disposed toward liking the Pastry Queen’s cake. And it really was great – fluffy, moist, tangy, even-textured (although it doesn’t look like that here – the recipe specifically warns not to overbake the cupcakes, so of course I underbaked them). However, in the end, I still preferred the recipe from Kelsey’s Apple A Day, originally from Saveur, which also has great texture, and I like the flavor a little more. But this is definitely a personal preference – you can’t go wrong with either recipe. Next time I might experiment with using the ingredients from AD, substituting butter for the oil, and using the mixing method from the Pastry Queen’s recipe.
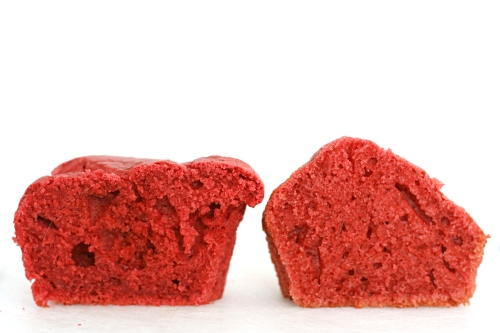
copy-of-img_2005left – Pastry Queen; right – Apple a Day

One year ago: A comparison of four vanilla frostings

Red Velvet Cake with Cream Cheese Frosting (from Apple a Day, who adapted it from www.saveur.com)

Makes 1 8-inch 3-layer cake

For the cake:
2½ cups cake flour
1½ cups sugar
1 teaspoon baking soda
1 tablespoon cocoa powder
1 teaspoon salt
2 eggs
1½ cups vegetable oil
1 cup buttermilk
2 tablespoons (1 oz.) red food coloring
1 teaspoon vanilla extract
1 teaspoon white distilled vinegar

For the frosting:
12 ounces cream cheese, softened
12 ounces butter, softened
1½ teaspoons vanilla extract
3 cups confectioners’ sugar
1½ cups chopped pecans (optional)

1. For the cake: Preheat oven to 350°.

2. Sift together flour, sugar, baking soda, cocoa, and salt into a medium bowl.

3. Beat eggs, oil, buttermilk, food coloring, vanilla, and vinegar in a large bowl with an electric mixer until well combined. Add dry ingredients and beat until smooth, about 2 minutes.

4. Divide batter evenly between 3 greased and floured 8″ round cake pans.

5. Bake cakes, rotating halfway through, until a toothpick inserted in the center of each cake comes out clean, 25-30 minutes. Let cakes cool 5 minutes, then invert each onto a plate, then invert again onto a cooling rack. Let cakes cool completely.

6. For the frosting: Beat cream cheese, butter, and vanilla together in a large bowl with an electric mixer until combined. Add sugar and beat until frosting is light and fluffy, 5-7 minutes.

4. Put 1 cake layer on a cake plate, level off with a serrated knife, and spread one-quarter of the frosting on top. Set another layer on top, level, and repeat frosting. Set remaining layer on top, level, and frost top and sides with the remaining frosting. Press pecans into the sides of the cake, if desired. **Tip: after leveling cake, turn it upside down to reduce numbers of crumbs. I also did a crumb coat on the outside, let it set for ten minutes, then finished with remaining frosting.

5. Chill for 2 hours to set frosting.

Red Velvet Cake (from Smitten Kitchen, who adapted it from “The Confetti Cakes Cookbook” by Elisa Strauss via the New York Times 2/14/07)

Bridget note: This is the frosting that I used. It was great. (I’ve never met a homemade cream cheese frosting that I didn’t like.) Also, note that this recipe makes 50% more than the others.

Makes 1 9-inch 3-layer cake

1 tablespoon unsalted butter
3½ cups cake flour
½ cup unsweetened cocoa (not Dutch process)
1½ teaspoons salt
2 cups canola oil
2¼ cups granulated sugar
3 large eggs
6 tablespoons (3 ounces) red food coloring or 1 teaspoon red gel food coloring dissolved in 6 tablespoons of water
1½ teaspoons vanilla
1¼ cup buttermilk
2 teaspoons baking soda
2½ teaspoons white vinegar.

1. Preheat oven to 350 degrees. Place teaspoon of butter in each of 3 round 9-inch layer cake pans and place pans in oven for a few minutes until butter melts. Remove pans from oven, brush interior bottom and sides of each with butter and line bottoms with parchment.

2. Whisk cake flour, cocoa and salt in a bowl.

3. Place oil and sugar in bowl of an electric mixer and beat at medium speed until well-blended. Beat in eggs one at a time. With machine on low, very slowly add red food coloring. (Take care: it may splash.) Add vanilla. Add flour mixture alternately with buttermilk in two batches. Scrape down bowl and beat just long enough to combine.

4. Place baking soda in a small dish, stir in vinegar and add to batter with machine running. Beat for 10 seconds.

5. Divide batter among pans, place in oven and bake until a cake tester comes out clean, 40 to 45 minutes. Let cool in pans 20 minutes. Then remove from pans, flip layers over and peel off parchment. Cool completely before frosting.

Red Cake (from my grandmother)

Makes 1 9-inch 2-layer cake

My grandmother isn’t known for adding a lot of detail to her recipes. I’ve added some.

Also, the frosting here isn’t the cream cheese frosting you usually see associated with red velvet cakes these days. Instead, it’s based on a cooked flour mixture similar to this.

2 ounces red food coloring
2 tablespoon cocoa
2¼ cups cake flour
1 teaspoon salt
½ cup shortening (I used butter of course), softened
1½ cups sugar
2 eggs
1 teaspoon vanilla
1 cup buttermilk
1 teaspoon vinegar
1 teaspoon baking soda

1. Adjust an oven rack to the middle position and preheat oven to 350C. Butter and flour two 9-inch cake pans. Make a paste out of the food coloring and the cocoa. Mix together the flour and salt.

2. Cream shortening and sugar until fluffy. Add eggs, one a time, then the vanilla. Mix in food coloring paste. Add a third of the flour mixture, then half the buttermilk, a third of the flour, half the buttermilk, and ending with the rest of the flour. Holding a small dish over the mixing bowl, add vinegar to baking soda, pouring it into the mixing bowl as it foams. (The original recipe now says “Beat as you would any cake.” That’s helpful!) Beat at medium speed for 30 seconds.

3. Pour the batter into the prepared pans and bake for 30 minutes, until a toothpick comes out clean. Let cool slightly in pans, then invert the cakes onto a cooling rack. When cool, split each later in two and frost.

Frosting:

3 tablespoons flour
1 cup milk
1 cup sugar
1 teaspoon vanilla
16 tablespoons (2 sticks) butter

Cook flour and milk until thick. Cool. Cream butter and sugar and vanilla until fluffy. Blend the creamed mixture into cooked mixture. Beat. The longer you beat it, the better it gets.

Red Velvet Cake (from Cooks Country Dec 2006/Jan 2007)

Serves 12

CC note: The recipe must be prepared with natural cocoa powder. Dutch-processed cocoa will not yield the proper color or rise.

Cake
2¼ cups all-purpose flour
1½ teaspoons baking soda
Pinch salt
1 cup buttermilk
1 tablespoon white vinegar
1 teaspoon vanilla extract
2 large eggs
2 tablespoons natural cocoa powder
2 tablespoons red food coloring
12 tablespoons (1½ sticks) unsalted butter, softened
1½ cups granulated sugar

Frosting
16 tablespoons unsalted butter, softened
4 cups confectioners’ sugar
16 ounces cream cheese, cut into 8 pieces, softened
1½ teaspoons vanilla extract
Pinch salt

1. For the cake: Adjust oven rack to middle position and heat oven to 350 degrees. Grease and flour two 9-inch cake pans. Whisk flour, baking soda, and salt in medium bowl. Whisk buttermilk, vinegar, vanilla, and eggs in large measuring cup. Mix cocoa with food coloring in small bowl until a smooth paste forms.

2. With electric mixer on medium-high speed, beat butter and sugar together until fluffy, about 2 minutes, scraping down bowl as necessary. Add one-third of flour mixture and beat on medium-low speed until just incorporated, about 30 seconds. Add half of buttermilk mixture and beat on low speed until combined, about 30 seconds. Scrape down bowl as necessary and repeat with half of remaining flour mixture, remaining buttermilk mixture, and finally remaining flour mixture. Scrape down bowl, add cocoa mixture, and beat on medium speed until completely incorporated, about 30 seconds. Using rubber spatula, give batter final stir. Scrape into prepared pans and bake until toothpick inserted in center comes out clean, about 25 minutes. Cool cakes in pans 10 minutes then turn out onto rack to cool completely, at least 30 minutes.

3. For the frosting: With electric mixer, beat butter and sugar on medium-high speed until fluffy, about 2 minutes. Add cream cheese, one piece at a time, and beat until incorporated, about 30 seconds. Beat in vanilla and salt. Refrigerate until ready to use.

4. When cakes are cooled, spread about 2 cups frosting on one cake layer. Top with second cake layer and spread top and sides of cake with remaining frosting. Cover and refrigerate until ready to serve, up to 3 days.

Read Full Post »

copy-of-img_1556

Ah, my sad little gingerbread photos. I had some issues with a tiny step in this recipe that I normally would have just ignored. “Butter the pan.” Pshaw, who butters their pans these days? Nonstick spray, baby!

Since I needed 7⅓ tablespoons of butter for the portion of the recipe that I was making, I figured I would just use the other ⅔ tablespoon to butter the pan. (I used an 8-inch square pan for ⅔ of the recipe.) Then when it came time to remove the cake from the pan, I got stubborn when it stuck. The damn cake would be coming out of the pan!

copy-of-img_1542

Um, yeah, that was dumb. It came out, all right, or about half of it did. The other half, the bottom half, was holding on tight to the pan. I quickly shoveled the broken cake pieces back into the pan and they melded together nicely. If I had been able to resist tasting the cake (through a forkful dug out of the middle), no one would have been the wiser.

copy-of-img_1544

Fortunately, the taste of the cake made up for the troubles. Dave and I both really like gingerbread, and although I had my doubts about combining it with chocolate, in the end I thought it was a good match. I enjoyed the chunks of chocolate in the cake, even though they all sank to the bottom. The bittersweet chocolate glaze was great too. My cake was a little dry, but it’s entirely possible that I overbaked it by a few minutes. Still, next time I’ll use twelve tablespoons of butter instead of eleven (for a full recipe). And I most certainly won’t use butter to grease the pan.

Heather, who chose this recipe for Tuesdays with Dorie, has the recipe posted.

copy-of-img_1553

Read Full Post »

copy-of-img_1496

I’ve been a member of Tuesdays with Dorie for ten months, and I haven’t missed even one week. I’ve posted through holidays, vacations, and…I’m trying to come up with a third thing to round out this sentence, but honestly, I have no life. Hence it’s been easy to stay on track with TWD. But this week really tested me – my dishwasher is broken. That’s been rough.

copy-of-img_1486

It’s a good thing I persisted though, because I forgot to take into account Dave’s love of fruit + cream desserts. He goes nuts for them. I made a fourth of this recipe, and we ate the whole thing on Saturday night. Dave was talking about it all day Sunday, and it wasn’t until the end of the day that he realized there was none left. He wasn’t happy.

copy-of-img_1471

I guess I’ll have to make it again sometime then! Which is no problem, because there were things I really liked about this as well as things I’d like to experiment with.

copy-of-img_1473

Like most of the group this week, my cake fell in the middle. I’d read through the reviews of people who made it before me and knew this was a possibility, so I was so careful when mixing up the batter. I certainly didn’t overmix, because there were still clumps of hard, dry flour in the baked cake. On the other hand, I could see the structure of the beaten eggs breaking down as I tried to fold in the flour, so I knew I had to stop.

copy-of-img_1479

It was no matter though, since we were hollowing out the cake anyway. Dorie’s instructions are to slice off the top of the cake, make a nest in the middle, fill the nest with berries and cream, then put the top of the cake back on. Because the sides of my cake were nice and high, I was able to do all of that except I didn’t have a “lid” to cover the filling with. I just spread the whipped cream topping right over the filling.

copy-of-img_1485

The other issue people had with the recipe was the filling, which is a combination of cream cheese, sugar, vanilla, and cream. So basically cheesecake batter, which I absolutely love. Dorie then whips up more heavy cream and mixes that with the cream cheese ingredients, but a lot of people were saying that the filling ended up bland, so I skipped the extra whipped cream.

copy-of-img_1522

There were things I loved about this recipe – the cream cheese filling, raspberries of course (I lucked out and found good ones for a reasonable price), the whipped cream topping…so basically everything except the sunken cake. To be honest, I’m not sure I’ve ever had a genoise I loved. When I make this again, which will be soon if Dave has any say in the matter, I’ll just use a different vanilla cake recipe.

Mary Ann has posted the recipe.

One year ago: Maple Walnut Cupcakes

copy-of-img_1492

Read Full Post »

copy-of-img_10641

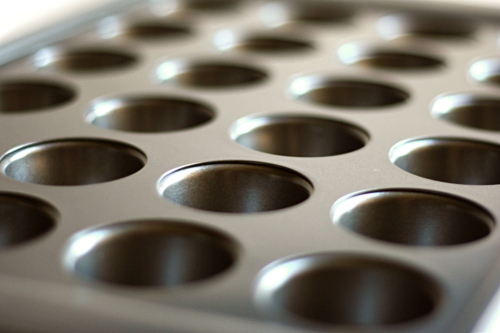
Due to an email mishap, I found out that I was going to get a mini muffin pan for Christmas a few weeks early. It was great; I had lots of time to get excited about it and think about exactly what I wanted its first use to be. Bite-sized cheesecake!

copy-of-img_10461

By the way, bite-sized cheesecake is a very bad idea. Even though post-Christmas detox is otherwise on in full force, I was hopeless in the face of these tiny cheesecakes. I ate one to make sure they were cooked through, then one when they had cooled a bit to make sure the consistency was right, then two that broke when I took them out of the pan, then one when I was taking the pictures, and one more after adding the strawberry sauce. Then two for dessert. <burp>

copy-of-img_1058a

One thing I really like about Dorie’s cheesecake recipes is her initial step of beating the cream cheese alone, before even the sugar is added. What a great way to ensure that there are no lumps in the final batter. I’ve started doing this with all cheesecakes.

copy-of-img_1062

The recipe calls for either heavy cream or sour cream to be added to the batter. I used sour cream. I’m far from an expert, but in my experience, heavy cream dulls and dilutes the cream cheese flavor, while sour cream enhances it.

The cheesecake was really really good (obviously,  if my uncontrollable snacking is any indicator). It seems like almost everyone in Tuesdays with Dorie loved it. The texture was kind of light and fluffy, which I liked, and the taste was spot on – the cream cheese flavor is balanced nicely between tart and sweet.

copy-of-img_1065

The recipe is posted on Anne’s website. For the minis, I used the same amount of crust ingredients, just pressing them into the muffin cups with the bottom of a small container. I made a fourth of the recipe, and I divided the cheesecake batter among 24 mini muffin cups, but this might be a little underfilled – you could probably fit the same amount of batter into just 18 cups. I baked the cheesecakes at 300 degrees (no water bath) for about 15 minutes, until they seemed fairly set. Then I left them in the oven, turned the oven off, and propped the door open. This seemed to keep them from sinking in the middle. I found it easiest to remove the cheesecakes from the pan when they were at room temperature, although last time I tried something similar, freezing them seemed to work too. When they were chilled from the refrigerator, they clung to the pan and broke apart when I tried to remove them.

copy-of-img_1067

Read Full Post »

copy-of-img_0149a

These days, most things I bake turn out well. So whenever I visit my parents in Albuquerque, I’m always disgruntled by the problems I have with recipes. I don’t have enough experience adapting to the high altitude. On my most recent trip, I was frustrated when my snickerdoodles ended up flat and crispy and stuck to the pan. When I made scones the next morning, I remembered to decrease the baking powder, and they came out delicious and tender, but not quite as pretty as when I made them at my nearly sea-level apartment in Pennyslvania.

copy-of-img_0081

My mom and I saw these red velvet whoopie pies in a magazine and could not resist them. Of course we forgot to adapt the recipe for the altitude at first. Apparently (according to my mom, who has more experience with these things), reducing the butter (sacrilege!) helps, but the butter and sugar were creaming before we thought of it, so we added some extra flour and hoped for the best.

copy-of-img_0134

They spread too much and stuck to the parchment a little, so they’re not quite as pretty and tall as many mini whoopie pies. Don’t let that turn you away from this recipe, because they were amazing even so! The cake was tender and moist with just a touch of chocolate flavor. And I’m confident that, made at lower altitudes, the little cakes will be just as delicious, but prettier as well. And they’re sandwiching a dollop of cream cheese frosting – <drool>.

copy-of-img_0145

One year ago: Slice-a-Fancy Cookies –  My mom just made these while I was visiting.  The ingredients are so simple, but the cookies taste good.

Red Velvet Whoopie Pies (cake recipe from Better Homes and Gardens December 2008, with a little more detail; cream cheese frosting from my mom’s carrot cake recipe)

We opted for a traditional cream cheese frosting instead of the one suggested with the recipe, which used marshmallow creme.

Makes 30 sandwiches

Cake:
2 cups (9.5-10 ounces) unbleached flour*
2 tablespoons cocoa powder (not Dutch processed)
½ teaspoon baking powder
¼ teaspoon salt
8 tablespoons (1 stick) butter, softened
1 cup (7 ounces) packed light brown sugar
1 egg, preferably room temperature
1 teaspoon vanilla extract
½ cup buttermilk, preferably room temperature
1 ounce (2 tablespoons) red food coloring

Filling:
4 ounces cream cheese, softened
4 tablespoons (½ stick) butter, softened
2 cups (8 ounces) powdered sugar
½ teaspoon vanilla

1. Adjust oven rack to middle position; preheat oven to 375F. Line baking sheets with parchment paper. In medium bowl, whisk together flour, cocoa, baking soda and salt.

2. In large mixing bowl, beat butter on medium-high speed for 30 seconds, until smooth. Add brown sugar and beat until light and fluffy, about 2 minutes. With mixer at medium speed, add egg and beat until thoroughly combined, then beat in vanilla. Add about one-third of flour mixture followed by half of buttermilk mixture, mixing until incorporated after each addition (about 15 seconds). Repeat using half of remaining flour mixture and all of remaining buttermilk mixture. Scrape down sides of bowl and add remaining flour mixture; mix at medium-low speed until batter is thoroughly combined, about 15 seconds. Remove bowl from mixer and fold batter once or twice with rubber spatula to incorporate any remaining flour.

3. Spoon (or pipe) batter in 1-inch diameter rounds about ½-inch high on prepared baking sheets, allowing 1 inch between each round.

4. Bake 7 to 9 minutes, or until tops are set. Cool cookies on cookie sheets.

5. To make filling: Add cream cheese and butter to mixer bowl and beat until smooth. Gradually add powdered sugar, alternating with vanilla. Beat until smooth.

6. To fill, dollop (or pipe) cream cheese filling on flat sides of half the cookies. Top with remaining cookies, flat sides down.

To store: Refrigerate in airtight container up to 4 days. Let stand at room temperature 15 minutes before serving.

*Cooks Illustrated uses 5 ounces for 1 cup of flour, and for the last couple of years, that’s what I’ve used when making recipes that only provide volume measurements. (I never measure flour by volume for baking – I think it’s a hassle.) However, I’m coming to realize that 5 ounces for 1 cup of regular flour is pretty high. I heard somewhere that Dorie Greenspan uses 4.8 ounces. Until I figure out what I want to use for recipes that call for flour by volume, I’ll have to be wishy-washy.

copy-of-img_0150

Read Full Post »

caramel cake

copy-of-img_9678

This will be my last Daring Baker entry. I’ve enjoyed being a member for the past year, and I learned something useful from every single recipe I’ve made for the group. However, between Tuesdays with Dorie and the Daring Bakers, the assigned baking recipes are starting to overwhelm me. I came really close to not making this cake, simply because I had pumpkin pie left from Thanksgiving, plus four types of cookies and two types of cupcakes in the freezer. I just couldn’t justify putting much time into making a dessert that we really didn’t need.

copy-of-img_9650

However, Erin convinced me that the recipe wasn’t difficult, and that I should be able to scale it back without adverse affects. (Based on warnings from this month’s hosts, Dolores, Alex, and Jenny, I was concerned that the recipe was going to be finicky.) She was right. This cake required only a little more time than an average cake recipe.

copy-of-img_9654

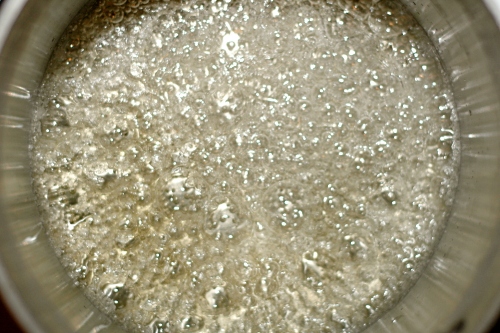
Plus a little extra effort for me, because I screwed up the caramel syrup the first time. The only times I have ever had a problem with caramel are this cake and the filbert gateau – I don’t know what it is with Daring Baker recipes and crystallized caramel. The second time I made the syrup, I doubled the amount of water I added with the sugar and tweaked the cooking method just a little. I left the amount of water at the end the same, under the assumption that all of the water that’s added with the sugar evaporates before the sugar starts to caramelize. This time I made a nice smooth caramel.

copy-of-img_9665

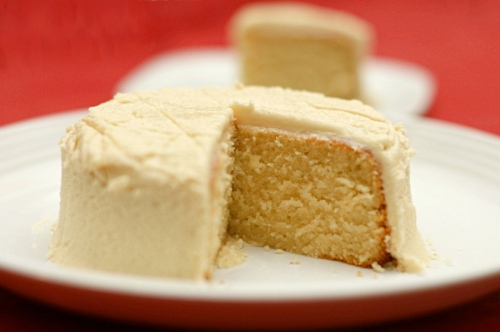
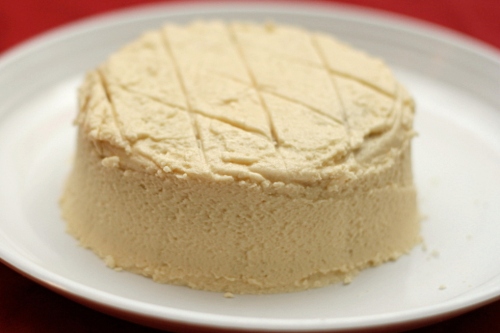
I considered skipping the frosting, but I don’t have much experience with browned butter, so I wanted to try it. It was interesting – it had an unusual texture. I didn’t add all of the powdered sugar, and I found that no amount of the caramel syrup was going to give me the smoothness I was hoping for, so I ended up adding a fair amount of heavy cream. Even then, the frosting was kind of dry and greasy at the same time. I couldn’t seem to spread it on the cake; I ended up using my fingers to pat it down.

copy-of-img_9671

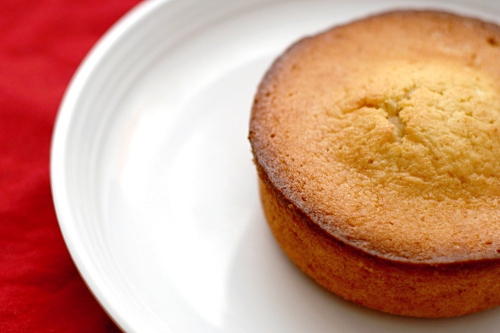
The cake was great. A nice fluffy, even texture, with a flavor reminiscent of my favorite pound cake. The frosting wasn’t bad, although it just didn’t seem quite right. Still, I’m glad I took the time to make this cake, and I’m glad I was a member of the Daring Bakers for the previous year. It was a fun and valuable experience.

copy-of-img_9674

Caramel Cake with Caramelized Butter Frosting (adapted slightly from Shuna Fish Lydon for Baking Bites)

Makes 12 servings

Caramel Syrup:
2 cups sugar
1½ cup water, separated

1. In a small stainless steel saucepan with tall sides, mix ½ cup water and sugar until mixture feels like wet sand. Brush down any stray sugar crystals with wet pastry brush. Turn on heat to highest flame. Cook until dark amber and smoking slightly.

2. Very carefully pour in remaining 1 cup of water. Caramel will jump and sputter about.

3. Whisk over medium heat until it has reduced slightly and feels sticky between two fingers.

Note: For safety reasons, have ready a bowl of ice water to plunge your hands into if any caramel should land on your skin.

Caramel Cake:
10 tablespoons unsalted butter at room temperature
1¼ cups granulated sugar
½ teaspoon kosher salt
1/3 cup Caramel Syrup (recipe follows)
2 each eggs, at room temperature
splash vanilla extract
2 cups all-purpose flour
½ teaspoon baking powder
1 cup milk, at room temperature

1. Preheat oven to 350F. Butter one tall (2 – 2.5 inch deep) 9-inch cake pan. Sift flour and baking powder.

2. In the bowl of a stand mixer fitted with a paddle attachment, cream butter until smooth. Add sugar and salt & cream until light and fluffy. Slowly pour room temperature caramel syrup into bowl. Scrape down bowl and increase speed. Add eggs/vanilla extract a little at a time, mixing well after each addition. Scrape down bowl again, beat mixture until light and uniform. Turn mixer to lowest speed, and add one third of the dry ingredients. When incorporated, add half of the milk, a little at a time. Add another third of the dry ingredients, then the other half of the milk and finish with the dry ingredients. Take off mixer and by hand, use a spatula to do a few last folds, making sure batter is uniform. Turn batter into prepared cake pan.

3. Place cake pan on cookie sheet or half-sheet pan. Set first timer for 30 minutes, rotate pan and set timer for another 15-20 minutes. Bake until sides pull away from the pan and skewer inserted in middle comes out clean. Cool cake completely before icing it.

Caramelized Butter Frosting:
12 tablespoons unsalted butter
1 pound confectioner’s sugar, sifted
4-6 tablespoons heavy cream
2 teaspoons vanilla extract
2-4 tablespoons caramel syrup
Kosher or sea salt to taste

1. Cook butter until brown. Pour through a fine meshed sieve into a heatproof bowl, set aside to cool.

2. Pour cooled brown butter into mixer bowl. In a stand mixer fitted with a paddle or whisk attachment, add confectioner’s sugar a little at a time. When mixture looks too chunky to take any more, add a bit of cream or caramel syrup. Repeat until mixture looks smooth and all confectioner’s sugar has been incorporated. Add salt to taste. (Caramelized butter frosting will keep in fridge for up to a month. To smooth out from cold, microwave a bit, then mix with paddle attachment until smooth and light.)

copy-of-img_9666

Read Full Post »

Older Posts »