Feeds:
Posts
Comments

Archive for the ‘tuesdays with dorie’ Category

copy-of-img_3207
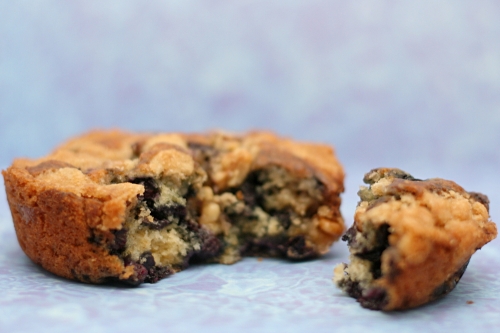
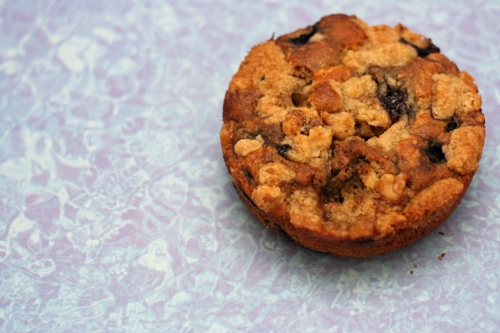
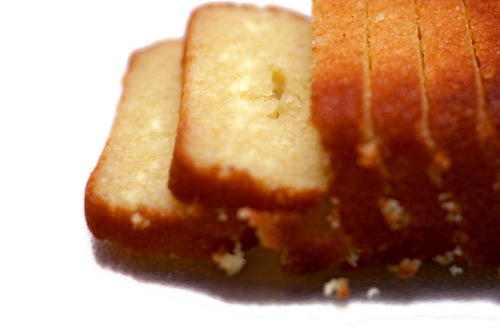
Dave and I decided to walk 1000 miles this year. It works out to about 20 miles per week, just under 3 miles per day. It’s an ambitious goal, but not unattainable. The problem is, we’re way behind. By the end of February, we were already half a month’s worth of miles behind where we should have been. And since our work schedules prohibit us from catching up during the week, our only option is to do a whole lot of walking on the weekends. Which works out great, because I feel a lot better about having a big piece of blueberry cake for breakfast when I walk 7½ miles right afterward.

copy-of-img_3191

This crumb cake follows the same process as many layer cakes – the butter and sugar are creamed together, the eggs and vanilla are slowly added, then the dry ingredients and liquid ingredients are added alternately. It’s topped with a buttery sugary nut mixture before being baked.

copy-of-img_3202

I thought it was very good. I’m always a big fan of blueberries (and cake), and I liked the walnuts quite a bit. The crumb topping was an enjoyable crisp contrast to the tender cake. It was maybe just the tiniest bit too sweet for me, so I think next time, I’ll actually reduce the crumb topping by half. And since I have a lot of miles to make up still, next time could be very very soon. Sihan has posted the recipe.

One year ago: Chocolate Sandwich Cookies

copy-of-img_3214

copy-of-img_3208

Read Full Post »

copy-of-img_2095

So what exactly is the difference between a biscuit and a scone? It seems to me that scones are just sweet biscuits. I’ve been going through a scone phase the last few months, making batches and freezing them unbaked. It makes for a great weekend breakfast, because there’s basically no work to do. Plus I love scones with coffee and I only drink coffee on the weekends. I know that technically, these aren’t scones. The name says biscuits, but I thought they’d fit right in with the theme.

copy-of-img_2080

They’re made just like any other biscuit (or scone) – mix the dry ingredients, cut (or rub) in the butter, stir in some liquid. In this case, the liquid includes sour cream, which seemed promising because I really like the tenderness of scones made with cream, and sour cream has that same richness.

copy-of-img_2082

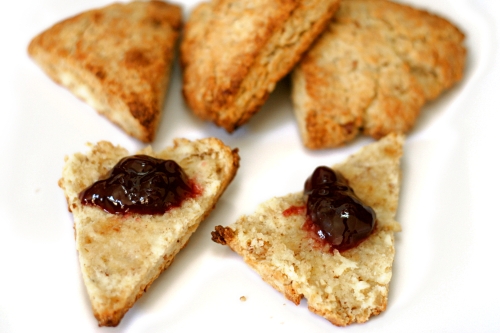
The biscuits were just as good as I had hoped. Not only were they light and tender, but I love the flavor of the nuts. I only put jam on my biscuit for the sake of the photograph, but then I decided that it was a great compliment. I’m so glad that I have a few more of these in the freezer, stocked up for a lazy weekend morning.

copy-of-img_2091

One year ago: Chocolate Cream Pie

Pecan Sour Cream Biscuits (from Dorie Greenspan’s Baking: From My Home to Yours)

2 cups (9.6 ounces) all-purpose flour (or 1¾ cups all-purpose flour and ⅓ cup cake flour)
1 tbsp baking powder
½ tsp salt
¼ tsp baking soda
¼ cup (packed) (1.74 ounces) light brown sugar
5 tbsp cold unsalted butter, cut into 10 pieces*
½ cup cold sour cream
¼ cup cold whole milk
⅓ cup finely chopped pecans, preferably toasted

Center a rack in the oven and preheat the oven to 425F. Get out a sharp 2-inch-diameter biscuit cutter, and line a baking sheet with parchment or a silicone mat.

Whisk the flour(s), baking powder, salt and baking soda together in a bowl. Stir in the brown sugar, making certain there are no lumps. Drop in the butter and, using your fingers, toss to coat the pieces of butter with flour. Quickly, working with your fingertips or a pastry blender, cut and rub the butter into the dry ingredients until the mixture is pebbly. You’ll have pea-size pieces, pieces the size of oatmeal flakes and pieces the size of everything in between – and that’s just right.

Stir the sour cream and milk together and pour over the dry ingredients. Grab a fork and gently toss and turn the ingredients together until you’ve got a nice soft dough. Now reach into the bowl with your hands and give the dough a quick, gentle kneading – 3 or 4 turns should be just enough to bring everything together. Toss in the pecans and knead another 2 to 3 times to incorporate them.

Lightly dust a work surface with flour and turn out the dough. Dust the top of the dough very lightly with flour and pat the dough out with your hands or roll it with a pin until it is about ½ inch high. Don’t worry if the dough isn’t completely even – a quick, light touch is more important than accuracy.

Use the biscuit cutter to cut out as many biscuits as you can. Try to the cut the biscuits close to one another so you get the most you can out of this first round. By hand or with a small spatula, transfer the biscuits to the baking sheet. Gather together the scraps, working them as little as possible, pat out to a ½-inch thickness and cut as many additional biscuits as you can; transfer these to the sheet. (The biscuits can be made to this point and frozen on the baking sheet, then wrapped airtight and kept for up to 2 months. Bake without defrosting – just add a couple more minutes to the oven time.)

Bake the biscuits 14 to 18 minutes, or until they are tall, puffed and golden brown. Transfer them to a serving basket.

copy-of-img_2094

Read Full Post »

copy-of-img_2446

While shopping for baking ingredients recently, I was inwardly complaining about recipes that call for a volume amount of ground nuts. I’ve never been able to find ground nuts in my well-stocked grocery store. That means that I have to grind my own, which is annoying because my food processor takes up basically my whole dishwasher, plus, if we’re going to have to grind our own nuts, shouldn’t the recipe indicate how much whole nuts we’ll need to grind to get the right amount of ground nuts? Blah blah blah, whine whine whine, and then I stumbled upon this:

copy-of-img_2258

Never mind! Let me tell you some things that don’t matter to me about buying these: 1) It’s probably far more expensive than grinding my own. 2) It’s going to take me months to use up a pound of ground almonds. Oh, and 3) these were the wrong type of nut for the recipe I bought them for. Whatever! Yay for not using the food processor!

copy-of-img_2436

With pre-ground nuts, this cake was really easy. I had a bit of a time crunch due to traveling, so I made it at my place Thursday night, then packed it in my suitcase the next day when I flew across the country. My sister and brother-in-law and I snacked on it the next night after putting my nephews to bed.

copy-of-img_2439

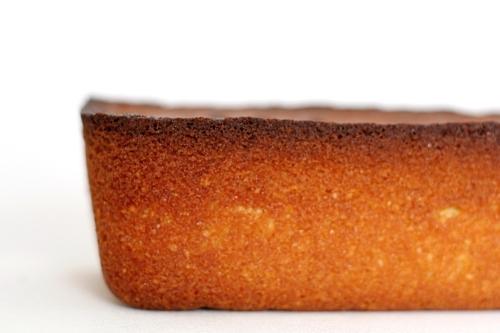
Dorie says twice in her introduction that the recipe is foolproof, so of course I had problems. Clearly the top of the cake is too dark, bordering on burned. I’m blaming my pyrex, instead of metal, loaf pan. I suppose I should lower the oven temperature 25 degrees when baking in pyrex. I didn’t want to serve the burned portion, so I trimmed it off before planning to add the glaze. Then I ate the trimmings and found them so tasty (and not burned-tasting at all) that I decided to skip the glaze altogether.

copy-of-img_2445

The cake was easy and delicious, sturdy enough to travel across the country with me, and was appropriate after dinner one night and for breakfast a few days later. Plus, I’ve now fairly well established that there’s a difference between baking in pyrex and metal that I’ll need to make adjustments for in the future. Altogether, a good Tuesdays with Dorie week for me. The recipe is posted on Liliana’s site.

One year ago: My first attempt at sushi rolls

copy-of-img_2493

Read Full Post »

copy-of-img_2420

Well, I didn’t intend to choose an unpopular dessert for Tuesdays with Dorie this week. I was picturing a satiny, lemony pots de crème-type custard. Obviously I didn’t pay enough attention to the ingredients, which, with just milk, whole eggs, lemon zest, and sugar, in no way indicate that this custard would be rich. Sorry, custard-haters!
copy-of-img_2431

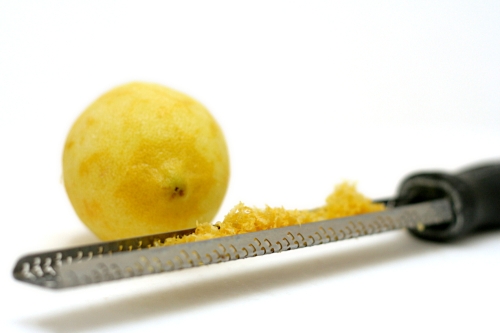
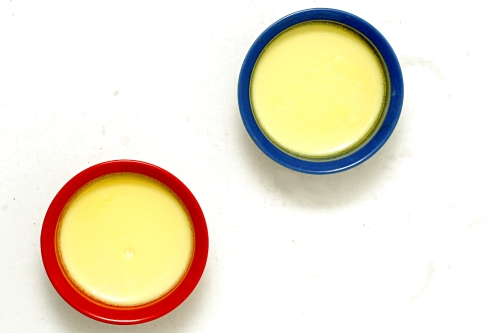
Hey, at least it was easy and didn’t use many ingredients. After the milk is steeped with lemon zest, it’s mixed into sugar and eggs, then baked in a water bath. I added a drop of lemon extract to half of my custards.

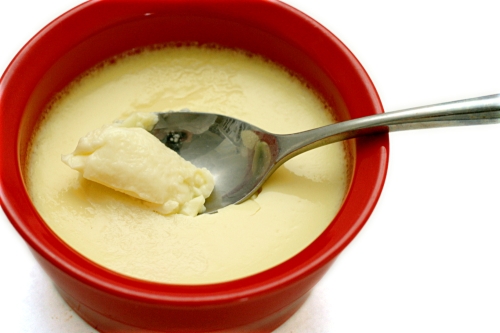
The lemon flavor was pretty tame, although it was noticeably stronger with the extract. The texture was certainly more eggy than I expected. I don’t mind the texture of classic baked custard, but I know it isn’t popular with a lot of people.

copy-of-img_2390

Overall, I thought the custard was light and refreshing, especially with the bit of lemon extract. It’s even a relatively healthy dessert – no butter, believe it or not! Not only that, but it was easy. So at least it was a winner in my book!
copy-of-img_2422

Lemon Cup Custard (from Baking: From my Home to Yours, by Dorie Greenspan)

Mine seemed to cook a little faster than Dorie indicates, so you might want to check them early.

Makes 6 servings

2¼ cups whole milk
grated zest of 1 lemon
4 large eggs
½ cup sugar
pure lemon oil or extract (optional)

Getting ready: Have six (6-ounce; ¾-cup) custard or coffee cups at hand. Put the milk and zest in a saucepan and bring just to a boil. Remove the pan from the heat, cover and set aside for 30 minutes so the zest can infuse the milk with its flavor. Reheat the milk before mixing the custard.

Getting ready to bake: Center a rack in the oven and preheat the oven to 325F. Line a roasting pan with a double thickness of paper towels and put the custard or coffee cups in the pan. Have a fine-mesh strainer at hand. Fill a teakettle with water and put it on to boil; when the water boils, turn off the heat.

In a 1-quart glass measuring cup or a heatproof bowl, whisk the eggs and sugar together until well blended. Still whisking, strain in about ¼ cup of the hot milk little by little – this will temper, or warm, the eggs so they won’t curdle. Whisking all the while, slowly strain in the remaining milk. Discard the zest remaining in the strainer. If you’d like a stronger lemon flavor – Dorie usually does – stir a few drops of lemon oil or extract into the custards. (Don’t go overboard – ⅛ teaspoon extract, less if you’re using oil, is about the most you’ll need.)

With a spoon, skim the foam off the top of the custard, then pour the custard into the cups. Very carefully slide the roasting pan into the oven, then pour enough hot water from the teakettle into the roasting pan to come halfway up the sides of the cups.

Bake the custards for 40 to 50 minutes, or until they jiggle only in the center when you tap the cups lightly. Transfer the cups to a rack and cool to room temperature, then cover and refrigerate for at least 2 hours before serving.

Serving: Serve just as is.

Storing: Well covered and away from foods with strong odors, the custards will keep in the refrigerator for up to 2 days.

Playing around:
Vanilla Cup Custard: Omit the lemon zest and oil or extract, and after the hot milk has been blended into the eggs, add 2½ teaspoons pure vanilla extract. (Dorie often adds ⅛ teaspoon pure almond extract too.) Alternatively, you can steep the milk with 1 split and scraped vanilla bean instead of using extract.

Lemon-Clove Cup Custard: Add 4 whole cloves to the milk along with the lemon zest.

Orange-Star Anise Cup Custard: Omit the lemon zest and oil or extract and add the grated zest of 1 orange and 3 points from a star anise to the milk before heating it.

Espresso-Cinnamon Cup Custard: Omit the lemon zest and oil or extract and add a cinnamon stick to the milk before heating it. Whisk 2 teaspoons instant espresso powder into the egg-sugar mixture.
copy-of-img_2408

Read Full Post »
copy-of-img_2209

I ran a little test with these muffins. I read somewhere, at some point, that it’s best to grease just the bottom of muffin cups and not the sides. But not all recipes specify this, so I’ve never known how important it is.

copy-of-img_2187

This muffin recipe, which was made by Tuesdays with Dorie before I joined the group, calls for the dry and wet ingredients to be mixed separately before folding them together. Because this is standard muffin procedure, it seemed like a good candidate to test out my question about oiling the cups.

copy-of-img_2191

For the six muffin cups on the outside of the pan (the two outer rows), I sprayed just the bottom of the cups. For the six muffin cups on the inside of the pan (the two inner rows), I sprayed the entire cup.

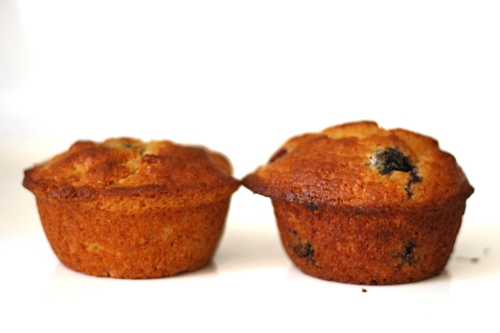
copy-of-img_2193left – bottoms only; right – whole cup

As you can see, the difference is striking. The muffins baked in the bottom-only sprayed cups rose taller and rounder. The muffins baked in the thoroughly sprayed cups have flat tops. My theory is that those muffins rose evenly on all sides, where the muffins baked in cups with unsprayed sides were held down at the sides and could only rise in the middle.

copy-of-img_2197left – whole cup sprayed; right – bottom only

Unfortunately, there’s another significant difference between each set, and that’s in how easily they came out of the pan. No one will be surprised to hear that the muffins in the completely sprayed cups were far easier to remove. The others needed a bit of prying around the edges before I could get them out of the pan, although they all came out cleanly.

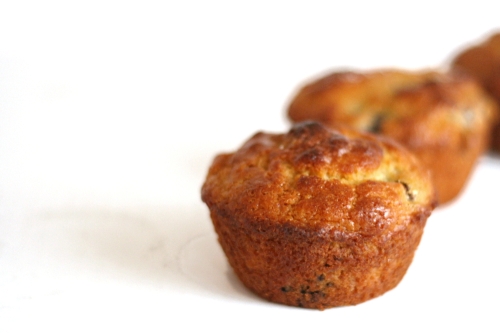
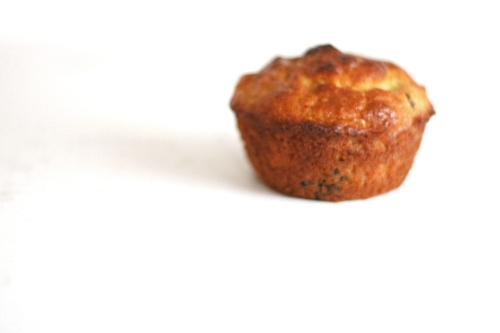
For me, the extra few minutes to get the muffins out of the pan are worth it for the beautifully domed tops. (Of course now I’m wondering if there was a difference in texture. If there was, I didn’t notice.) And if the prize after carefully removing each muffin is these tender orange-scented treats studded with juicy blueberries, all the better.

copy-of-img_2198left – whole cup sprayed; right – bottom only

One year ago: Rice Pudding

Orange Berry Muffins (from Dorie Greenspan’s Baking: From my Home to Yours)

The only change I made was doubling the salt. However, you can see that my muffins got a little too dark. I know my baking pan has a dark finish, but I’ve never had problems with muffins before, so you might want to lower the oven temperature a bit, or at least check the muffins earlier than the recommended 22 minutes.

Grated zest and juice of 1 orange
About ¾ cup buttermilk
2 large eggs
3 tablespoons honey
1 stick (8 tablespoons) unsalted butter, melted and cooled
⅓ cup (2.33 ounces) sugar
2 cups (9.6 ounces) all-purpose flour
2½ teaspoons baking powder
¼ teaspoon baking soda
¼ teaspoon salt
1 cup blueberries – fresh, preferably, or frozen (not thawed)
Decorating sugar, for topping (optional)

Center a rack in the oven and preheat the oven to 400 degrees F. Butter or spray the 12 molds in a regular-size muffin pan or fit the molds with paper muffin cups. Alternatively, use a silicone muffin pan, which needs neither greasing nor paper cups. Place the muffin pan on a baking sheet.

Pour the orange juice into a large glass measuring cup or a bowl and pour in enough buttermilk to make 1 cup. Whisk in the eggs, honey and melted butter.

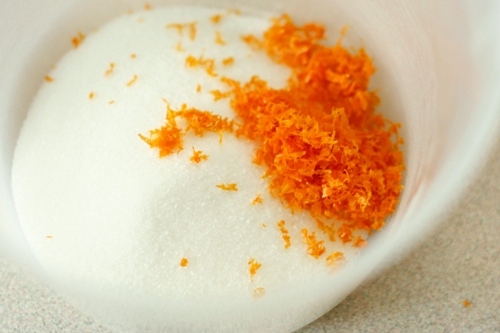
In a large bowl, rub the sugar and orange zest together with your fingertips until the sugar is moist and the fragrance of orange strong. Whisk in the flour, baking powder, baking soda and salt. Pour the liquid ingredients over the dry ingredients and, with the whisk or a rubber spatula, gently but quickly stir to blend. Don’t worry about being thorough – the batter will be lumpy and bubbly, and that’s just the way it should be. Stir in the blueberries. Divide the batter evenly among the muffin cups.

Bake for 22 to 25 minutes. If you want to top the muffins with decorating sugar, sprinkle on the sugar after the muffins have baked for 10 minutes. When fully baked, the tops of the muffins will be golden and springy to the touch and a thin knife inserted into the center of the muffins will come out clean. Transfer the pan to a rack and cool for 5 minutes before carefully removing each muffin from its mold.

copy-of-img_2212

Read Full Post »
copy-of-img_2303

Dave was watching a Cleveland Cavelier’s basketball game while I made this cake. When LeBron James, doing what LeBron James does, executed some crazy maneuver that only he could have pulled off, the announcers praised his creativity. Dave noted that for anyone else, the move would have been called stupid, but then for anyone else, the move wouldn’t have worked.

copy-of-copy-of-img_2260

Putting prunes in chocolate cake is basically the same thing. If it works, you’re creative. If not, you’re…something else.

copy-of-img_2265

For this cake, prunes are chopped, softened in hot water, and flambéed.  The prunes are mixed with egg yolks, sugar, melted chocolate and butter, flour and ground nuts, and beaten egg whites. The cooled cake is topped with a rich chocolate glaze. Put this way, it sounds a lot simpler than over an hour of baking and at least six dirty bowls proved it to be.

copy-of-img_2290

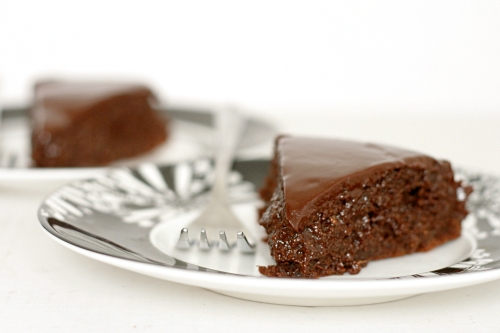
Baking the cake is where I, and it seems a number of other people, ran into problems. Dorie instructs that the cake is done when the sides are pulling away from the pan, the top is crisp, and a knife inserted into the center is “streaky.” Hm…”streaky” isn’t very definitive. My cake seemed to pass all three of those conditions and even unmolded cleanly, but when I cut into it, I realized it was gooey in the center. A better indicator of doneness would be a final temperature to be reached, to be read with an instant-read thermometer.

copy-of-img_2293

Regardless, I hereby decree Dorie creative, and not crazy, because a gooey center could not detract from just how delicious this cake is. If I hadn’t known, I would not have been able to identify the prunes in the cake, and certainly not the whiskey. However, there was definitely something more to this cake than a regular chocolate cake. I have two-thirds of it left, and it’ll be a miracle if I get through the day without stealing tiny slices here and there. It’ll be a miracle if I get through the next hour, honestly. (I did not make it. It’s half an hour later and I’m eating cake. And I agree with Dorie that it’s better at room temperature, but it isn’t half-bad cold either.)

copy-of-img_2298

Lyb has the recipe posted. I used whiskey instead of Armagnac, prunes instead of raisins, and ground almonds instead of walnuts. I wouldn’t change anything about the ingredients, but if you make this, err on the side of less streaky on a knife inserted into the middle at the end of baking. This cake is so moist that I think it would be a challenge to dry it out.

One year ago: Raspberry Bars

copy-of-img_2309

Read Full Post »

copy-of-img_2148

I haven’t missed a Tuesday with Dorie since I joined the group last April. There were a few times, when I was traveling or something, where it was close, but for the most part, it’s been easy. I never really understood what the big deal was with people who only made half the recipes. It’s not like I wouldn’t be baking every chance I got anyway.

copy-of-img_2124

Oh, did I mention that I was unemployed for most of the last year, and had an easy part-time job for the remainder? Yeah, that makes a difference. Everything seems so easy when you don’t have to actually work.

copy-of-img_2127

Now that I have a much more demanding job, I’m getting each TWD recipe done just by the skin of my teeth. I’ve gotten in the habit of finishing the recipes Monday night, and I’m lucky if I can get the blog entry done by the end of Tuesday.

copy-of-img_2130

As I’m more rushed to finish each recipe, I find myself diving into the baking before I read it through. I was halfway through making these before I realized that they were basically fancied-up chocolate chip cookies. Woohoo!

copy-of-img_2135

The base is a cinnamon- and espresso-enriched shortbread version of a chocolate chip cookie. Once that’s baked, it’s topped with finely chopped chocolate that quickly melts, then finished off with toffee bits. The cinnamon and espresso were pretty subtle – I couldn’t pick them out, but there was a little spice in the cookie. Overall, I really enjoyed these and wouldn’t change anything next time I make them.

Whitney has the recipe posted.

One year ago: Challah

copy-of-img_2150

Read Full Post »

copy-of-img_2027

You know what the best thing about this cake was? No worries about getting crumbs in the frosting!

copy-of-img_2016

But really the best thing was the rich chocolate cake layered with fluffy vanilla frosting, which pretty much sums up my favorite dessert. I used to get it all the time in college at my favorite dessert café.

copy-of-img_2013

I made one third of the cake recipe in pans large enough to hold one quarter of the recipe, because I heard that there was some problems with the cake not rising. My cakes seemed to rise okay. But clearly I need to wrap a wet towel around the pans or invest in the magic cake strips for these little pyrex pans, because I always end up with the weirdest shaped cakes when I use them.

copy-of-img_2018

I was supposed to cut the cake layers in half and crumble one of the layers, but with such domed tops that I’d have to cut off anyway, it seemed like a shame to crumble a whole layer in addition. Instead, I made my cake four layers instead of three and just used the crumbs from the evened out tops to decorate the outside.

copy-of-img_2019

I don’t have much experience with this marshmallowy type of frosting, but I really liked it with this cake. I love meringue anyway – I love the feel of all the little bubbles popping in my mouth. I added a pinch of salt to the frosting to cut the sweetness a little. Also, bonus – fat free frosting!

Altogether, this was a great cake. Stephanie, who chose this recipe for Tuesdays with Dorie, has the recipe posted.

copy-of-img_2030

Read Full Post »

copy-of-img_1962

When you make a commitment to bake a recipe every single week, some of those weeks are by necessity going to be half-assed. It’s not that I’m any less interested in floating islands than any other dessert – it sounds tasty, and it’s definitely not something I have experience with – it just happens that this week I have another dessert project that dominating my attention right now.

copy-of-img_1946

Floating islands are meringues that have been poached in milk and are served with crème anglaise. It wasn’t that I skimped too much on the effort involved; it’s just that I decided to use only one egg. That means I made a quarter of the meringue recipe and one sixth of the crème anglaise.

copy-of-img_1955

None of this recipe was very difficult, although the work involved with multi-component desserts always seems to add up. The only portion I had any problem with was the poaching, and most of that was because I didn’t carefully read the instructions that warn you that the meringues will deflate after poaching. I thought I had screwed them up, so I ate one while I poached the rest.

I served the floating islands with berry coulis. Dave and I both thought that the dessert was really good. It would be even better with some fresh berries. I’ll have to try that next time. Shari has the recipe posted.

copy-of-img_1957

Read Full Post »

copy-of-img_1691

This week, I’m one of those reviewers – the ones who tweak the recipe beyond recognition, then say the recipe sucks and no one should bother making it.

Except for the ‘beyond recognition’ and ‘the recipe sucks’ parts, at least. For whatever reason, I took it upon myself to, um, improve upon this recipe. Yes, the World Peace Cookie recipe that has gotten one shining review after another.

copy-of-img_1632

But a few Tuesdays with Dorie members said the dough was so crumbly they could hardly roll it into a log, and that trying to slice cookies off of the log was a mess. So I added an extra tablespoon of butter. And then I figured that what’s a chocolate cookie doing without espresso powder? So I added some. And I forgot to buy fleur de sel, so I used some coarse sea salt that I’ve had forever.

copy-of-img_1643

And the result was good. Not mind-blowing, but good. I don’t think the espresso was a good idea – the bitterness didn’t really blend into this cocoa-flavored cookie. The extra butter seemed like it was a good thing, because the dough was still pretty crumbly. On the other hand, there was a bit of a spreading problem during baking. (Maybe a higher temperature would solve that?)

copy-of-img_1669

Actually, I’m not sure shortbread is really my thing. I’m not against it, mind you, but my ideal cookie is chewier. I like them; I just like these chocolate cookies better.

Jessica (along with a lot of other people) has the recipe posted.

One year ago: Chocolate Cupcakes

copy-of-img_1680

Read Full Post »

Older Posts »