Feeds:
Posts
Comments

Archive for the ‘beef’ Category

copy-of-img_2344

Last week I was at the grocery store with my parents, trying to choose a dessert to bring home to share. My dad wanted strawberry cake, and my mom wanted German chocolate cake. I wasn’t going to get in the middle of this, and honestly, I don’t know why my dad even offers his opinion. Dessert is a decision that my mom will always get to make.

copy-of-img_2314

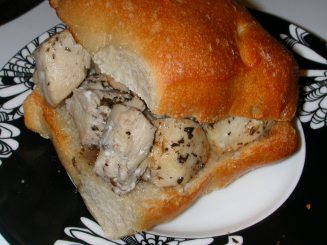
Apparently that apple doesn’t fall far from the tree, because Dave and I were recently choosing a menu item to split to go with our pot of mussels – he wanted a reuben, and I wanted smoked duck salad. Of course we got salad, but only after I promised to make Dave a reuben at home.

copy-of-img_2321a

First I had to make rye bread. I was inundated with recipes – Peter Reinhart has several, and King Arthur’s Flour has far too many to choose between. I thought that Cooks Illustrated’s recipe would be a safe bet for my first time making rye bread.

copy-of-img_2324

One of the reasons I like CI for my first time attempting something is the specific instructions they offer. Not just rye flour, but medium or light rye flour. If only I had had so many options. After searching my grocery store, the only rye flour I could find was organic and whole grain, and forget the rye flakes that the recipe also recommends.

copy-of-img_2326

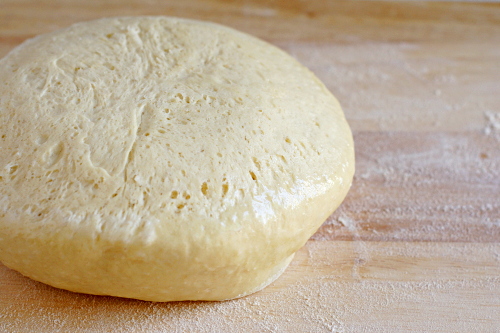
I was concerned that my bread would be a flop due to the whole grain flour, and it didn’t help that the dough’s texture was different from what I’m used to. It seemed heavier and less elastic. The rising times were longer than what the recipe indicates, which I’m attributing to the whole grain flour.

Fortunately, it all worked out, and this made some very good bread – a little bitter from the rye and scented from the caraway seeds, and firm enough to hold up to a sandwich without being unpleasantly dense.  It made for some exceptionally good reubens.

copy-of-img_2347

One year ago: Lemon Poppy Seed Muffins – I have a batch of these in my freezer right now.  I had one yesterday.

Deli-Style Rye Bread (from Cooks Illustrated)

Makes 1 large loaf

This is half of Cooks Illustrated’s original recipe. I have no idea why their original recipe makes such a huge amount of bread. This seems more practical.

Sponge:
⅓ cup rye flakes (optional)
1⅞ cups water, at room temperature
¾ teaspoon instant yeast
1 tablespoon honey
1½ cups (7½ ounces) unbleached all-purpose flour

Dough:
¾ cups (3¾ ounces) unbleached all-purpose flour, plus more for dusting the work surface
1¾ cups (6.125 ounces) medium or light rye flour
1 tablespoon caraway seeds
1 tablespoon vegetable oil
1½ teaspoon salt

Glaze:
1 egg white
1 tablespoon milk

1. For the sponge: Heat the oven to 350 degrees; toast the rye flakes, if using, on a small baking sheet until fragrant and golden brown, 10-12 minutes. Cool to room temperature. Mix the water, yeast, honey, rye flakes, and flour in the mixing bowl of a standing mixer to form a thick batter. Cover with plastic wrap and let sit until bubbles form over the entire surface, at least 2½ hours. (The sponge can stand at cool room temperature overnight.)

2. For the dough: Stir the all-purpose flour, 1 ½ cups of the rye flour, the caraway seeds, oil, and salt into the sponge. Attach the dough hook and knead the dough at low speed, adding the remaining rye flour once the dough becomes cohesive; knead until smooth yet sticky, about 5 minutes. With moistened hands, transfer the dough to a well-floured work surface, knead into a smooth ball, then place it in a very lightly oiled large bowl or straight-sided container. Cover with plastic wrap and let rise at warm room temperature until doubled in size, 1½ to 2 hours.

3. Generously sprinkle the cornmeal on a large baking sheet. Turn the dough onto a lightly floured work surface and press it into a 6 by 9-inch rectangle. With the long side facing you, roll the dough into a 9-inch log, seam-side up. Pinch the seam with your fingertips to seal. Turn the dough seam-side down, and, with your fingertips, seal the ends by tucking them into the loaf. Carefully transfer the shaped loaf to the prepared baking sheet, cover loosely with oiled plastic wrap, and let rise until the dough looks bloated and dimply and starts to spread out, 60-75 minutes. Adjust an oven rack to the lower-middle position and heat the oven to 425 degrees.

4. For the glaze: Whisk the egg white and milk together and brush over the sides and top of the loaf. Right before baking, make 6 or 7 slashes, ½-inch deep, in the top of the dough with a single-edge razor blade or a very sharp knife. Bake for 15 minutes, then lower the oven temperature to 400 degrees and bake until golden brown and an instant-read thermometer inserted in the center of the loaf reads 200 degrees, 15-20 minutes. Transfer to a wire rack and cool to room temperature.

copy-of-img_2332

Read Full Post »

pot roast

copy-of-img_1993
Dave and I don’t eat a lot of beef; in fact, this is only the fourth beef recipe on my site. To us, there are environmental factors to consider with eating beef, as well as humanitarian, health, and cost issues. Plus we just plain like vegetarian food. So when we had pot roast in some form or another for dinner three out of four days last week, Dave was starting to question me. I blamed Kevin, who not only made a delicious-looking pot roast recently, but then made sandwiches and soup out of the leftovers, both of which I wanted to try.

copy-of-img_1933

I got the pot roast recipe from Cooks Illustrated. I hadn’t made one of their recipes in a while, and I found that I missed pulling out their huge cookbook and turning the pictureless pages full of recipes that promise to teach me something as well as taste wonderful.

copy-of-img_1938

For their pot roast, they brown the meat in a very hot Dutch oven, then sauté some vegetables and use broth to deglaze the pan. Then everything is cooked in the oven for four hours. They mention in their discussion about the development of the recipe that they tried adding red wine with the broth and found that it was good, but it wasn’t really pot roast. True – it’s beef in Barolo (or it would be if you were to use Barolo, which I never would because it’s too expensive), which I happen to love. So I added some red wine with the broth. When the roast is so soft it’s falling apart, it’s removed from the pot and the remaining liquid is boiled down to a sauce.

copy-of-img_1988

Oh my gosh, it was so good. I served it with boiled new potatoes and glazed carrots, and it was a meal that I couldn’t get enough of. Two days later, I put the meat and some sauce on pain a l’ancienne with swiss cheese and horseradish to make great sandwiches. The day after that, I added it, along with the rest of the sauce and some diluted chicken broth, to a pan of sautéed onions and mushrooms for a really good pot roast soup.

Because we don’t eat beef often, when we do, we like it to be a treat. This certainly was.

copy-of-img_2000

One year ago: Salmon Pesto Pasta

Pot Roast (from Cooks Illustrated)

Serves 6-8

Cooks Illustrated recommends a chuck-eye roast, which is what I used. I’ve found that it can be difficult to find though.

I added about 1/4 cup red wine with the broths.

1 boneless chuck roast (about 3½ pounds)
salt and pepper
2 tablespoons vegetable oil
1 medium onion, chopped
1 small carrot, chopped
1 small celery rib, chopped
2 cloves garlic, minced
2 teaspoons sugar
1 cup canned low sodium beef broth
1 cup low-sodium chicken stock
1 sprig fresh thyme
¼ cup dry red wine

1. Adjust an oven rack to the middle position and heat oven to 300F. Thoroughly pat the roast dry with paper towels; sprinkle generously with salt and pepper.

2. Heat the oil in a large heavy-bottomed Dutch oven over medium-high heat until shimmering but not smoking. Brown roast thoroughly on all sides, reducing heat if fat begins to smoke, 8-10 minutes. Transfer the roast to a large plate; set aside.

3. Reduce the heat to medium; add onions, carrots, and celery to pot and cook, stirring occasionally, until beginning to brown, 6-8 minutes. Add the garlic and sugar; cook until fragrant, about 30 seconds. Add the chicken and beef broths and thyme, scraping the bottom of the pan with a wooden spoon to loosen the browned bits. Return the roast and any accumulated juices to the pot; add enough water to come halfway up the sides of the roast. Bring the liquid to a simmer over medium heat, then cover tightly and transfer the pot to oven.

4. Cook, turning the roast every 30 minutes, until fully tender and a meat fork slips in and out of meat very easily (3½-4 hours). Transfer the roast to a carving board and tent with foil to keep warm.

5. Allow the liquid in the pot to settle about 5 minutes, then use a wide spoon to skim fat off the surface; discard thyme sprig. Boil over high heat until reduced to about 1½ cups, about 8 minutes. Add the red wine and reduce again to 1½ cups, about 2 minutes. Season to taste with salt and pepper.

6. Cut the meat into ½-inch slices, or pull apart in pieces; transfer the meat to a warmed serving platter and pour about ½ cup sauce over the meat. Serve, passing remaining sauce.

copy-of-img_1991

Read Full Post »

I try not to participate in many blog events, since about a third of my entries are already committed to Tuesdays with Dorie and the Daring Bakers. But Elly’s Eat to the Beat is such a great idea, and I thought it could be a fun way to meld my favorite hobby with Dave’s, which is music.

Dave learned to play guitar from his uncle, who plays lead guitar in this song. His best friend, Sid Faiwu, does the drums and synthesizer in this song. The three of them played together for years until Dave and Sid both moved away from their home town as well as from each other. Now they try to send around mp3’s of new songs, but that obviously doesn’t work well.

Dave wrote this song, Bustle, in grad school after a particularly stressful test. It’s one of my favorites. The song is very dark, and really not about food in any way. The only line that I could think to apply to food was “dripping red.” Because of the nature of the song, I wanted something that would look as bloody as possible. And what’s bloodier than red wine sauce dripping down animal flesh?

I know I’ve been overdoing the Cooks Illustrated recipes lately, but I can’t seem to stop myself. I turn to their recipes for classics, like this steak with pan sauce. I feel like their recipes are less mass-produced and therefore more carefully developed than a lot of those from the Food Network or epicurious. And I’m generally bad at cooking steak, so I needed as much detail as possible.

The steak came out really well. I only undercooked it a little, and at least I didn’t burn the outside like I often do. The sauce was good as well. I think next time I’ll reduce the sugar by half, but other than that, it was perfect with the steak. And it certainly looks as gory as the song sounds.

Pan-Seared Steak with Red Wine Pan Sauce for Two (from Cooks Illustrated)

Serves 2

CI note: Pan sauces cook quickly, so prepare the ingredients before you begin cooking the steaks. Use a heavy skillet with a nonreactive cooking surface.

Bridget note: I used strip steak, because it’s my favorite.

2 boneless 8-ounce rib-eye steaks or top loin steaks, 1 to 1¼ inches thick, thoroughly dried
Table salt and ground black pepper
1 small shallot, minced (about 2 tablespoons)
1 teaspoon brown sugar
¼ cup dry red wine , such as Cabernet Sauvignon
¼ cup low-sodium chicken broth
1 bay leaf
1½ teaspoons balsamic vinegar
½ teaspoon Dijon mustard
1½ tablespoons unsalted butter , cut into 3 pieces
½ teaspoon minced fresh thyme leaves

1. Heat heavy-bottomed, 10-inch skillet over high heat until very hot, about 3 minutes. Meanwhile, season both sides of steaks with salt and pepper.

2. Lay steaks in pan, leaving ¼-inch of space between each; reduce heat to medium-high, and cook without moving until well browned, about 4 minutes. Using tongs, flip steaks; cook 4 minutes more for rare, 5 minutes more for medium-rare, and 6 minutes more for medium. Transfer steaks to large plate and tent with foil to keep warm.

3. Off heat, add shallot and sugar to empty skillet; using pan’s residual heat, cook, stirring frequently, until shallots are slightly softened and browned and sugar is melted, about 45 seconds. Return skillet to high heat, add wine, broth, and bay leaf; bring to boil, scraping up browned bits on pan bottom with wooden spoon. Boil until liquid is reduced to 3 tablespoons, about 4 minutes. Stir in vinegar and mustard; cook at medium heat to blend flavors, about 1 minute longer. Off heat, whisk in butter until melted and sauce is thickened and glossy. Add thyme and season to taste with salt and pepper. Remove bay leaf, spoon sauce over steaks and serve immediately.

Read Full Post »

Dave’s co-workers tease him about how he always gets to eat gourmet food. “So she makes gourmet lunches for you to bring to work, and then you go home and eat gourmet dinners, and before bed have a gourmet dessert.” Um. Not always. I wonder what they’ll have to say about the leftovers from this meal?

I wasn’t sure what to do with the hot dogs leftover from the franks and beans. In my opinion, the only good way to eat hot dogs is crispy and a bit blackened from a grill or fire, preferably topped with chili. Since I don’t have a grill, my options were limited. Boiled (or worse – microwaved) hot dogs didn’t sound appetizing.

copy-of-img_1739Updated 3/20/09: Also good in mini!

Lemontartlet inspired me to wrap them in bread and bake them. It solves the problem of how to cook the hot dogs indoors, and I guarantee that my homemade bread is far tastier than a storebought hot dog bun. (Lemontartlet used biscuit dough, but I made a yeast bread.)

I based the bread recipe on a recipe for Parker House rolls, thinking that the butter in the recipe would give make it nice and tender, while the sugar would provide the flavor I wanted. It was a perfect match. The bread did expand more than I was expecting when I baked it, and I might (if such a thing is possible) have ended up with too much bread per dog. I’ll adjust the recipe and give better proportions below.

I found that the best method for rolling out the dough was to use my fingertips to flatten the dough balls a bit, and then roll in only one direction. I was using Nathan’s Beef Franks (recommended by Cooks Illustrated and definitely the best hot dogs I’ve had), which I think are a little shorter than most. Most of my rolls ended up just the right width to almost-but-not-quite coat the whole dog.

If you’re a perfectionist and want your pigs perfectly wrapped in those blankets, which I did but I didn’t figure out this trick until the last one, you can roll the bread dough out a little wider than the dog, then fold in the edges and roll a few times in the other (long) direction. You’ll have a more perfect rectangle, which will more perfectly coat your hot dog and evenly distribute your bread. And look a teensy bit better.

Either way, these are super fun, and other than roasting them over a fire until they’re slightly blackened, this has to be my favorite way to eat hot dogs!

Pigs in a Blanket (bread recipe adapted from Ultimate Bread, by Eric Treuille and Ursula Feriggno)

This is enough bread dough for 10 hot dogs.  If your package only has 8, you can make dinner rolls out of the remaining dough.

Bread dough:
3 tablespoons unsalted butter
¾ cup milk
1½ tablespoons sugar
2 eggs
3½ cups (17½ ounces) unbleached flour
1½ teaspoons instant yeast
1½ teaspoons salt

10 hot dogs
2 tablespoons milk

1. Heat butter in small saucepan over medium heat until just melted. Add ¾ cup milk and sugar. If butter re-solidifies, heat until it’s completely melted. Remove from the heat and beat in the eggs.

2. Mix flour, salt, and yeast in bowl of standing mixer fitted with dough hook. Turn machine to low and slowly add milk mixture. When dough comes together, increase speed to medium (setting number 4 on a KitchenAid mixer) and mix until dough is smooth, shiny, and elastic, stopping machine two or three times to scrape dough from hook if necessary, about 8 minutes. Knead in extra flour, 1 tablespoon at a time, if the dough is too sticky. The dough should be not be dry, but soft. Turn dough onto lightly floured work surface; knead to form smooth, round ball, about 15 seconds. (Alternatively, you can knead by hand for 10 minutes.)

2. Place dough in very lightly oiled bowl, rubbing dough around bowl to lightly coat. Cover bowl with plastic wrap; place in warm, draft-free spot until dough doubles in size, about 1-1½ hours.

3. Divide the dough into 10 pieces. Shape each piece into a smooth ball. Let rest 10 minutes. Line baking pan with silicon baking mat or parchment paper.

4. Flatten each piece into a rough rectangle using the tips of your fingers. Roll in one direction until dough is ¼-inch thick. Roll in opposite direction (across shorter width) a few times, then fold in long edges to make perfect rectangle. Roll in long direction until dough is 1/8-inch thick. Place 1 hot dog near a short end, then tightly roll, keeping the tips of the hot dog exposed. Place seam side down on prepared baking pan. Repeat with remaining dough and hot dogs.

5. Cover with plastic wrap and let rise until dough is slightly inflated, about 30 minutes. Meanwhile, heat oven to 375 degrees.

6. Brush the dough with milk. Bake for 20-25 minutes, until golden. Let cool 15 minutes before serving.

Read Full Post »

spaghetti and meatballs

I actually made this dish a couple of months ago, but never got around to putting it in my blog. There’s not much to say about it, other than that spaghetti and meatballs are delicious. What’s not to love about pasta, sauce, and dressed-up meat?

copy-of-img_8364Updated photo 11.08.08

Of course, not all spaghetti and meatballs are created equal. But I’ve had my share of meatballs, and I’ve never had any better than these. This dish is a classic that will always please.

Classic Spaghetti and Meatballs (from Cooks Illustrated January 1998)

Serves 4 to 6

CI note: This streamlined recipe can be on the table in under an hour.

Bridget note: I find that recipes almost always call for more pasta per sauce than I prefer. Therefore, I would serve this with 12 ounces pasta instead of the 1 pound that the recipe calls for.

Meatballs
2 slices white sandwich bread (crusts discarded), torn into small cubes
½ cup buttermilk or 6 tablespoons plain yogurt thinned with 2 tablespoons sweet milk
¾ pound ground beef chuck (or 1 pound if omitting ground pork below)
¼ pound ground pork (to be mixed with ground chuck)
¼ cup grated Parmesan cheese
2 tablespoons minced fresh parsley leaves
1 large egg yolk
1 small clove garlic, minced (1 teaspoon)
¾ teaspoon table salt
Ground black pepper
vegetable oil for pan-frying (about 1¼ cups)

Simple Tomato Sauce
2 tablespoons extra-virgin olive oil
1 teaspoon minced garlic
1 can (28 ounces) crushed tomatoes
1 tablespoon minced fresh basil leaves
Table salt and ground black pepper
1 pound spaghetti
grated Parmesan cheese
1. For the meatballs: Combine bread and buttermilk in small bowl, mashing occasionally with fork, until smooth paste forms, about 10 minutes.

2. Mix all meatball ingredients, including bread mixture and pepper to taste in medium bowl. Lightly form 3 tablespoons of mixture into 1½-inch round meatballs; repeat with remaining mixture to form approximately 14 meatballs. (Compacting them can make the meatballs dense and hard. Can be placed on large plate, covered loosely with plastic wrap, and refrigerated for several hours.)

3. Bring 4 quarts of water to boil in large pot for cooking pasta.

4. Meanwhile, heat ¼-inch vegetable oil over medium-high heat in 10- or 11-inch sauté pan. When edge of meatball dipped in oil sizzles, add meatballs in single layer. Fry, turning several times, until nicely browned on all sides, about 10 minutes, regulating heat as needed to keep oil sizzling but not smoking. Transfer browned meatballs to paper towel–lined plate; set aside. Repeat, if necessary, with remaining meatballs.

5. For the sauce, discard oil in pan, leaving behind any browned bits. Add olive oil along with garlic; sauté, scraping up any browned bits, just until garlic is golden, about 30 seconds. Add tomatoes, bring to boil, and simmer gently until sauce thickens, about 10 minutes. Stir in basil; add salt and pepper to taste. Add meatballs and simmer, turning them occasionally, until heated through, about 5 minutes. Keep warm over low flame.

6. Meanwhile, add 1 tablespoon salt and pasta to boiling water. Cook until al dente, drain, and return to pot. Ladle several large spoonfuls of tomato sauce (without meatballs) over spaghetti and toss until noodles are well coated. Divide pasta among individual bowls and top each with a little more tomato sauce and 2 to 3 meatballs. Serve immediately with grated cheese passed separately.

Read Full Post »

dscn1869.jpg

There are so many mistakes in life that can’t be undone. Sharp words to a friend, a poor job interview, even a stubbed toe.

But when mistakes are made in the kitchen, there’s always the opportunity to try it until we get it right.

And thus it was that I found myself making more sandwiches this week. And this time-I nailed it.

The spiedies were made just the same as the original recipe, except I didn’t broil them until they were dry as a bone! I also saved a bit of unused marinade to toss over the cooked chicken pieces. These sandwiches were all that I had hoped for-juicy and flavorful.

And, as Sara’s advice came a bit too late, in that I’d already purchased the steak for the next set of cheesesteaks, I had to do some more pounding. However, this time I cleverly cut the steak in half crosswise, so I wasn’t trying to flatten an inch and a half thick steak down to a quarter inch thickness. This was indeed far easier. I didn’t spend 10 years in college for nothing, folks! I spent less than five minutes flattening my steak this time, and maybe it’s just me, but it didn’t sound nearly so loud and abrasive.

dscn1897.jpg

I also layered on some more onions and cheese, and this was a sandwich worth eating twice within a week!

And-the cheesesteak bonus? The next day we found at that we’re moving to Philadelphia!

dscn1909.jpg

Read Full Post »

dscn1783.jpg

The final installment to sandwich week didn’t go well. (Neither did the second installment, if you recall.)

The cheesesteak recipe comes from Alton Brown’s Good Eats. The Food Network’s write-up of it wasn’t very clear, so I even rewatched the segment of the show where Alton makes them.

Of course, in the happy land of TV cooking, someone else takes your chunk of beef and pounds it into a sheet of beef. In the land of apartment cooking, you piss off the neighbors. And the husband.

dscn1773.jpg dscn1781.jpg

I only got my beef tenderloin steak down to about ½-inch thickness before my somewhat-ill husband beseeched me to stop with the pounding. I heated up my All-Clad stainless-steel skillet for a couple minutes on the highest heat possible, threw on my oiled steak, and rushed around the apartment turning on fans and opening windows before the fire-alarm went off. Notice that I didn’t say anything about salting the steak, which I forgot to do.

By the time I got back to the stove after trying to dissipate the smoke, the first side was turning fairly black. So I flipped the steak, then took the hot pan and stood outside to let the second side’s allotment of smoke disperse out there. When the pan got too heavy for me to hold anymore, I came inside and wrapped the steak in foil while I cooked up some onions.

After a few minutes, I unwrapped the and started cutting it up. And, it was totally uncooked on the inside. Yes, I realize that people eat steaks rare, but they don’t eat cheesesteaks rare. And that’s where the microwave came in. I’m so ashamed.

Cheesesteaks
Makes 2 sandwiches

1 beef tenderloin steak, 6-8 ounces
salt
pepper
1 tablespoon olive oil
1 yellow onion, sliced thin
2 ounces cheddar cheese, grated
2 hoagie rolls

Let the meat sit at room temperature for 1 hour.

Pound the steak to ½-inch thickness. Season liberally with salt and pepper, and rub with 1 teaspoon of oil.  Heat a heavy-bottomed skillet over medium-high heat for a few minutes. Cook until cooked through, about 3-4 minutes per side. Wrap the meat in foil. Heat the remaining 2 teaspoons oil in the same skillet. Cook the onions over medium heat until browned.

Slice the meat into small strips. Divide evenly among the rolls. Top with any remaining juice from the meat, then onions and cheese. Wrap in foil for 10 minutes to let the flavors meld; serve.

Read Full Post »