I broke something and managed to go back in time two years. Here’s hoping it’s fixed soon – I need that recipe for strawberry daiquiri ice cream!

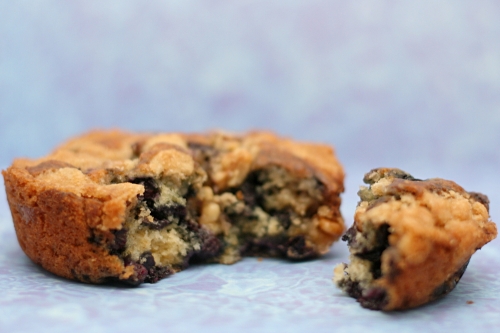
Dave and I decided to walk 1000 miles this year. It works out to about 20 miles per week, just under 3 miles per day. It’s an ambitious goal, but not unattainable. The problem is, we’re way behind. By the end of February, we were already half a month’s worth of miles behind where we should have been. And since our work schedules prohibit us from catching up during the week, our only option is to do a whole lot of walking on the weekends. Which works out great, because I feel a lot better about having a big piece of blueberry cake for breakfast when I walk 7½ miles right afterward.

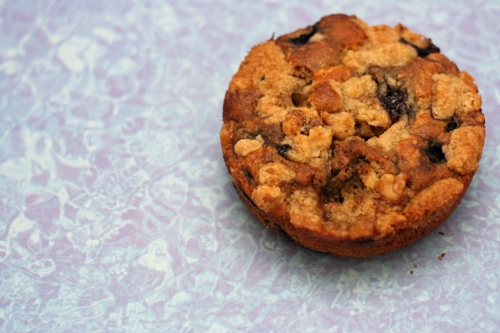
This crumb cake follows the same process as many layer cakes – the butter and sugar are creamed together, the eggs and vanilla are slowly added, then the dry ingredients and liquid ingredients are added alternately. It’s topped with a buttery sugary nut mixture before being baked.

I thought it was very good. I’m always a big fan of blueberries (and cake), and I liked the walnuts quite a bit. The crumb topping was an enjoyable crisp contrast to the tender cake. It was maybe just the tiniest bit too sweet for me, so I think next time, I’ll actually reduce the crumb topping by half. And since I have a lot of miles to make up still, next time could be very very soon. Sihan has posted the recipe.
One year ago: Chocolate Sandwich Cookies
Posted in breakfast, cake, dessert, fruit, tuesdays with dorie | 30 Comments »

So what exactly is the difference between a biscuit and a scone? It seems to me that scones are just sweet biscuits. I’ve been going through a scone phase the last few months, making batches and freezing them unbaked. It makes for a great weekend breakfast, because there’s basically no work to do. Plus I love scones with coffee and I only drink coffee on the weekends. I know that technically, these aren’t scones. The name says biscuits, but I thought they’d fit right in with the theme.

They’re made just like any other biscuit (or scone) – mix the dry ingredients, cut (or rub) in the butter, stir in some liquid. In this case, the liquid includes sour cream, which seemed promising because I really like the tenderness of scones made with cream, and sour cream has that same richness.

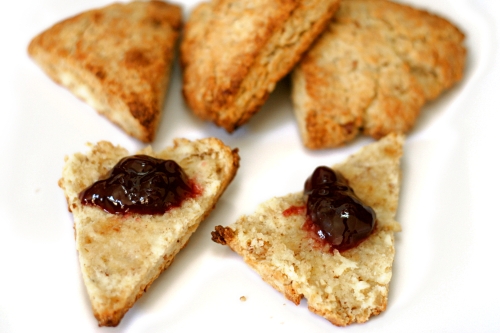
The biscuits were just as good as I had hoped. Not only were they light and tender, but I love the flavor of the nuts. I only put jam on my biscuit for the sake of the photograph, but then I decided that it was a great compliment. I’m so glad that I have a few more of these in the freezer, stocked up for a lazy weekend morning.

One year ago: Chocolate Cream Pie
Pecan Sour Cream Biscuits (from Dorie Greenspan’s Baking: From My Home to Yours)
2 cups (9.6 ounces) all-purpose flour (or 1¾ cups all-purpose flour and ⅓ cup cake flour)
1 tbsp baking powder
½ tsp salt
¼ tsp baking soda
¼ cup (packed) (1.74 ounces) light brown sugar
5 tbsp cold unsalted butter, cut into 10 pieces*
½ cup cold sour cream
¼ cup cold whole milk
⅓ cup finely chopped pecans, preferably toasted
Center a rack in the oven and preheat the oven to 425F. Get out a sharp 2-inch-diameter biscuit cutter, and line a baking sheet with parchment or a silicone mat.
Whisk the flour(s), baking powder, salt and baking soda together in a bowl. Stir in the brown sugar, making certain there are no lumps. Drop in the butter and, using your fingers, toss to coat the pieces of butter with flour. Quickly, working with your fingertips or a pastry blender, cut and rub the butter into the dry ingredients until the mixture is pebbly. You’ll have pea-size pieces, pieces the size of oatmeal flakes and pieces the size of everything in between – and that’s just right.
Stir the sour cream and milk together and pour over the dry ingredients. Grab a fork and gently toss and turn the ingredients together until you’ve got a nice soft dough. Now reach into the bowl with your hands and give the dough a quick, gentle kneading – 3 or 4 turns should be just enough to bring everything together. Toss in the pecans and knead another 2 to 3 times to incorporate them.
Lightly dust a work surface with flour and turn out the dough. Dust the top of the dough very lightly with flour and pat the dough out with your hands or roll it with a pin until it is about ½ inch high. Don’t worry if the dough isn’t completely even – a quick, light touch is more important than accuracy.
Use the biscuit cutter to cut out as many biscuits as you can. Try to the cut the biscuits close to one another so you get the most you can out of this first round. By hand or with a small spatula, transfer the biscuits to the baking sheet. Gather together the scraps, working them as little as possible, pat out to a ½-inch thickness and cut as many additional biscuits as you can; transfer these to the sheet. (The biscuits can be made to this point and frozen on the baking sheet, then wrapped airtight and kept for up to 2 months. Bake without defrosting – just add a couple more minutes to the oven time.)
Bake the biscuits 14 to 18 minutes, or until they are tall, puffed and golden brown. Transfer them to a serving basket.
Posted in bread, breakfast, freezer friendly, quick bread, tuesdays with dorie | 9 Comments »

Last week I was at the grocery store with my parents, trying to choose a dessert to bring home to share. My dad wanted strawberry cake, and my mom wanted German chocolate cake. I wasn’t going to get in the middle of this, and honestly, I don’t know why my dad even offers his opinion. Dessert is a decision that my mom will always get to make.
Apparently that apple doesn’t fall far from the tree, because Dave and I were recently choosing a menu item to split to go with our pot of mussels – he wanted a reuben, and I wanted smoked duck salad. Of course we got salad, but only after I promised to make Dave a reuben at home.
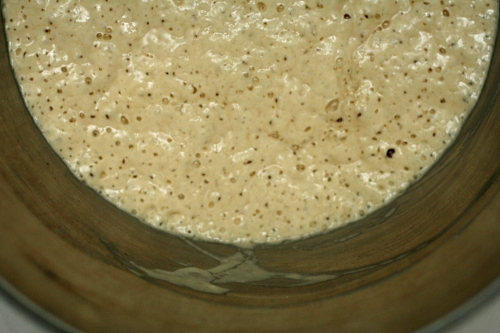
First I had to make rye bread. I was inundated with recipes – Peter Reinhart has several, and King Arthur’s Flour has far too many to choose between. I thought that Cooks Illustrated’s recipe would be a safe bet for my first time making rye bread.
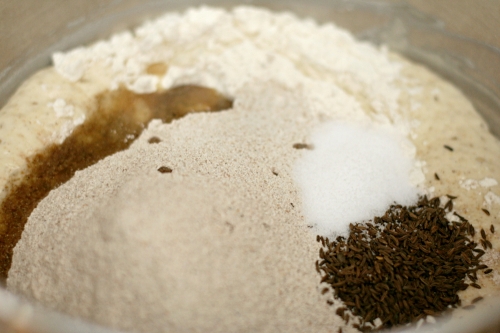
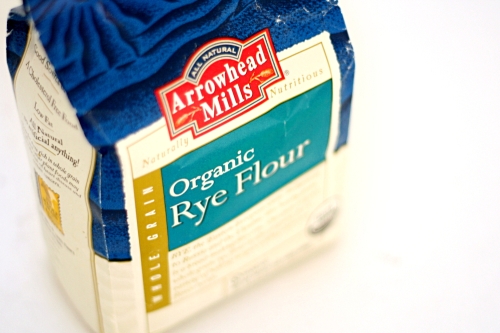
One of the reasons I like CI for my first time attempting something is the specific instructions they offer. Not just rye flour, but medium or light rye flour. If only I had had so many options. After searching my grocery store, the only rye flour I could find was organic and whole grain, and forget the rye flakes that the recipe also recommends.
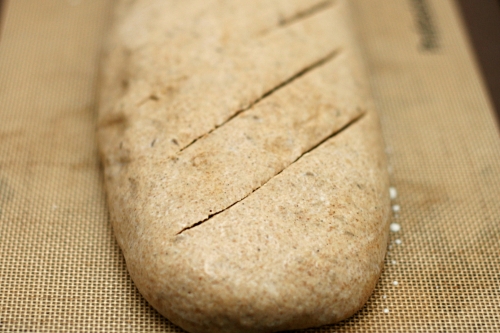
I was concerned that my bread would be a flop due to the whole grain flour, and it didn’t help that the dough’s texture was different from what I’m used to. It seemed heavier and less elastic. The rising times were longer than what the recipe indicates, which I’m attributing to the whole grain flour.
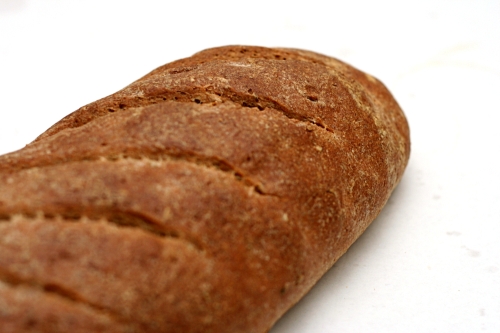
Fortunately, it all worked out, and this made some very good bread – a little bitter from the rye and scented from the caraway seeds, and firm enough to hold up to a sandwich without being unpleasantly dense. It made for some exceptionally good reubens.

One year ago: Lemon Poppy Seed Muffins – I have a batch of these in my freezer right now. I had one yesterday.
Deli-Style Rye Bread (from Cooks Illustrated)
Makes 1 large loaf
This is half of Cooks Illustrated’s original recipe. I have no idea why their original recipe makes such a huge amount of bread. This seems more practical.
Sponge:
⅓ cup rye flakes (optional)
1⅞ cups water, at room temperature
¾ teaspoon instant yeast
1 tablespoon honey
1½ cups (7½ ounces) unbleached all-purpose flour
Dough:
¾ cups (3¾ ounces) unbleached all-purpose flour, plus more for dusting the work surface
1¾ cups (6.125 ounces) medium or light rye flour
1 tablespoon caraway seeds
1 tablespoon vegetable oil
1½ teaspoon salt
Glaze:
1 egg white
1 tablespoon milk
1. For the sponge: Heat the oven to 350 degrees; toast the rye flakes, if using, on a small baking sheet until fragrant and golden brown, 10-12 minutes. Cool to room temperature. Mix the water, yeast, honey, rye flakes, and flour in the mixing bowl of a standing mixer to form a thick batter. Cover with plastic wrap and let sit until bubbles form over the entire surface, at least 2½ hours. (The sponge can stand at cool room temperature overnight.)
2. For the dough: Stir the all-purpose flour, 1 ½ cups of the rye flour, the caraway seeds, oil, and salt into the sponge. Attach the dough hook and knead the dough at low speed, adding the remaining rye flour once the dough becomes cohesive; knead until smooth yet sticky, about 5 minutes. With moistened hands, transfer the dough to a well-floured work surface, knead into a smooth ball, then place it in a very lightly oiled large bowl or straight-sided container. Cover with plastic wrap and let rise at warm room temperature until doubled in size, 1½ to 2 hours.
3. Generously sprinkle the cornmeal on a large baking sheet. Turn the dough onto a lightly floured work surface and press it into a 6 by 9-inch rectangle. With the long side facing you, roll the dough into a 9-inch log, seam-side up. Pinch the seam with your fingertips to seal. Turn the dough seam-side down, and, with your fingertips, seal the ends by tucking them into the loaf. Carefully transfer the shaped loaf to the prepared baking sheet, cover loosely with oiled plastic wrap, and let rise until the dough looks bloated and dimply and starts to spread out, 60-75 minutes. Adjust an oven rack to the lower-middle position and heat the oven to 425 degrees.
4. For the glaze: Whisk the egg white and milk together and brush over the sides and top of the loaf. Right before baking, make 6 or 7 slashes, ½-inch deep, in the top of the dough with a single-edge razor blade or a very sharp knife. Bake for 15 minutes, then lower the oven temperature to 400 degrees and bake until golden brown and an instant-read thermometer inserted in the center of the loaf reads 200 degrees, 15-20 minutes. Transfer to a wire rack and cool to room temperature.
Posted in beef, bread, sandwiches, yeast bread | 10 Comments »
While shopping for baking ingredients recently, I was inwardly complaining about recipes that call for a volume amount of ground nuts. I’ve never been able to find ground nuts in my well-stocked grocery store. That means that I have to grind my own, which is annoying because my food processor takes up basically my whole dishwasher, plus, if we’re going to have to grind our own nuts, shouldn’t the recipe indicate how much whole nuts we’ll need to grind to get the right amount of ground nuts? Blah blah blah, whine whine whine, and then I stumbled upon this:

Never mind! Let me tell you some things that don’t matter to me about buying these: 1) It’s probably far more expensive than grinding my own. 2) It’s going to take me months to use up a pound of ground almonds. Oh, and 3) these were the wrong type of nut for the recipe I bought them for. Whatever! Yay for not using the food processor!

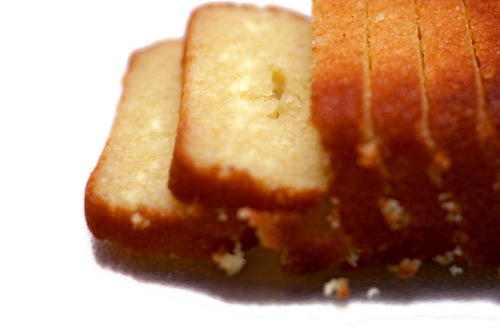
With pre-ground nuts, this cake was really easy. I had a bit of a time crunch due to traveling, so I made it at my place Thursday night, then packed it in my suitcase the next day when I flew across the country. My sister and brother-in-law and I snacked on it the next night after putting my nephews to bed.

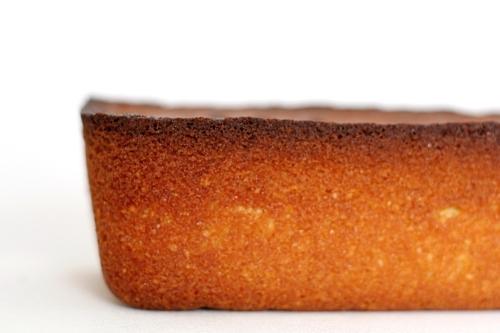
Dorie says twice in her introduction that the recipe is foolproof, so of course I had problems. Clearly the top of the cake is too dark, bordering on burned. I’m blaming my pyrex, instead of metal, loaf pan. I suppose I should lower the oven temperature 25 degrees when baking in pyrex. I didn’t want to serve the burned portion, so I trimmed it off before planning to add the glaze. Then I ate the trimmings and found them so tasty (and not burned-tasting at all) that I decided to skip the glaze altogether.

The cake was easy and delicious, sturdy enough to travel across the country with me, and was appropriate after dinner one night and for breakfast a few days later. Plus, I’ve now fairly well established that there’s a difference between baking in pyrex and metal that I’ll need to make adjustments for in the future. Altogether, a good Tuesdays with Dorie week for me. The recipe is posted on Liliana’s site.
One year ago: My first attempt at sushi rolls
Posted in cake, dessert, french, fruit, tuesdays with dorie | 16 Comments »

I hardly ever cook large roasts of meat, but when I do, I find like I like the leftovers even more than the original meal. I had lots of fun after Thanksgiving, and found that pot roast makes an amazing soup and sandwich. And roast chicken, to be honest, hardly ever impresses me served plain with dinner, but once it’s cooled and mixed with mayonnaise for some chicken salad, I am one happy camper.

This time, though, I forwent the mayonnaise for something more interesting. I happened to come across a recipe for chicken artichoke pizza when I had shredded roast chicken, artichokes, and pizza dough in the freezer. I was practically forced to make it. Plus it sounded delicious.

I made calzones instead of pizza mostly just because I hadn’t made them in a while, but I do think that the sizable chunks of shredded chicken that I wanted to use would be more appropriate in a calzone. Calzones, though, are undoubtedly more work than pizza. Instead of rolling out one round of dough for every 2-3 people, you’re rolling out one per person, and once the ingredients are added, the edges need to be crimped.
The extra work was worth it for me, because I really enjoyed these calzones. Pesto, chicken, and artichokes are a great combination, and it can only get better with cheese.

One year ago: (Almost) No-Knead Bread
Chicken Artichoke Pesto Calzones (ingredients adapted from Stefany’s pizza, which is adapted from allrecipes; calzone method adapted from Cooks Illustrated)
Serves 8
I used mozzarella because I had it, but I think fontina would be even better.
2½ pounds pizza dough (a full recipe of this one would be perfect)
1 cup pesto
1 cup frozen artichokes, defrosted and roughly chopped
2 cups shredded cooked chicken
2 cups (8 ounces) shredded mozzarella or fontina cheese
olive oil for brushing
1. Adjust the oven rack to the lowest position, set a pizza stone on the oven rack, and heat the oven to 500 °F (260°C) for at least 30 minutes. Turn the risen dough out onto an unfloured work surface. Divide the dough into eight equal pieces. Gently reshape each piece of dough into a ball. Cover with plastic wrap or a damp kitchen towel, and let the dough rest at least 15 minutes but no more than 30 minutes.
2. Working with one piece of dough at a time and keeping the other pieces covered, stretch and pull the dough into a 7- to 8-inch round. (I don’t like to roll pizza dough, but I suppose you could if you prefer.) Set it aside while you stretch out the remaining rounds of dough. You’ll want to form and fill just four at a time, and then work on the other four while the first set bakes. (Cooks Illustrated stacks the rounds with squares of parchment paper in between; I like to use a kitchen towel.)
3. Spread 2 tablespoons pesto onto each round of dough, leaving about a 1-inch border around the edge. Divide the toppings evenly between the eight dough rounds, forming a pile in the center of the bottom half of each dough round and leaving a 1-inch border uncovered.

4. Fold the top half of the dough over the filling-covered bottom half, leaving ½-inch border uncovered. (The photo above shows how the dough doesn’t overlap all the way. Look at the left half of the photo, where the dough isn’t crimped yet.) With your fingertips, lightly press around the silhouette of the filling and out to the edge to lightly seal the dough shut.
5. Beginning at one end of the seam, place your index finger diagonally across the edge and gently pull the bottom layer of the dough over the tip of your index finger; press into the dough to seal. (Hopefully the same picture helps illustrate this.) Repeat the process until the calzone is fully sealed.
6. With a pastry brush, brush the tops and sides of the calzones with olive oil. Carefully transfer the calzones to parchment paper; slide the calzones on the parchment onto a pizza peel or rimless baking sheet, then slide the calzones with parchment onto the hot pizza stone, spacing them evenly apart. Bake until the calzones are golden brown, about 11 minutes; use a pizza peel or rimless baking sheet to remove the calzones with the parchment to a wire rack. Remove the calzones from the parchment, cool 5 minutes, and serve. While the first batch of calzones bakes, form the second batch and bake them after removing the first batch from the oven.

Posted in cheese, chicken, italian, pizza, vegetables | 17 Comments »
Someone asked me recently if I save posts for certain times when I think they’ll be more popular. I said that I didn’t; I just post when I have something ready, although I usually have a bit of a queue to choose from. But then I realized that I had just made green bread, and of course it’s more fun to look at green bread near the middle of March than it is in February!
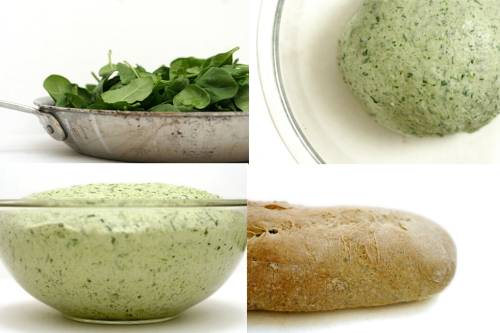
The color comes from cooked spinach, which I recently said that I don’t like, but when I said that, I meant I don’t like it plain. I like it quite a bit when it’s mixed in with dough. Seriously, what doesn’t get better when you mix it with flour?
 (I didn’t bake it like this; I was just enjoying the caterpillar resemblance.)
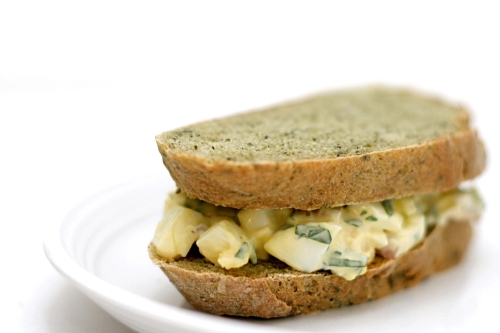
The finely chopped cooked spinach is kneaded into fairly traditional bread dough, which is then treated like any other bread – it rises, is shaped, proofed, baked, and cooled. The result is a spring green, pleasantly spinachy, tender loaf of bread, which can then be made into the best egg salad sandwich ever, or a mean grilled cheese. Which would be perfect served along some green beer for St. Patrick’s Day, don’t you think?

One year ago: Spaghetti and Meatballs
Spinach Bread (adapted from Ultimate Bread, by Eric Treuille and Ursula Ferrigno)
You could probably use frozen spinach for this instead of cooking your own. The instructions are for a long loaf, but you can make this bread into pretty much any shape you want.
5 ounces spinach
2 teaspoons instant yeast
3½ cups (17.5 ounces) unbleached flour
2 teaspoons salt
1 cup water, room temperature
1 tablespoon vegetable or canola oil
1. Place cleaned spinach leaves and any water that clings to them in a nonreactive soup kettle. (If you’re using pre-washed bagged spinach, add 2 tablespoons water to the pot). Cover and cook over medium-high heat until spinach wilts, 2-4 minutes. Cool spinach slightly and squeeze out the excess liquid. Chop very finely, or puree in a food processor.
2. Mix the flour, salt, and yeast in the bowl of a standing mixer fitted with dough hook. Turn machine to low and slowly add the water, then the spinach and oil. When dough comes together, increase the speed to medium and mix until dough is smooth and satiny, stopping machine two or three times to scrape dough from hook if necessary, about 10 minutes. If after 5 minutes, the dough sticks to the sides of the bowl, add more flour, 1 tablespoon at a time.
3. Lightly oil a large bowl. With floured (or lightly oiled) hands, shape the dough into a ball and transfer it to the bowl, rolling it to coat with the oil. Cover the bowl with plastic wrap or a damp towel. Let rise until doubled in size, about 1 to 1½ hours. Press to deflate, then let rest for 10 minutes.
4. Gently pat the dough into a rough rectangle. Fold the bottom third of dough, letter style, up to the center and press to seal, creasing surface tension on the outer edge. Fold the remaining dough over the top and use the edge of your hand to seal the seam closed and to increase the surface tension all over. Press evenly with the palms of both hands and roll the dough backward and forward until it is 10 inches in length. Line a sheet pan with baking parchment. Place the loaf on the pan and lightly dust with flour. Cover loosely with plastic wrap.
5. Proof at room temperature for about 45 minutes, or until the loaves have grown to about twice their original size.
6. About half an hour into the second rise, place a baking stone* on the bottom rack of the oven and preheat the oven to 450F.
7. Using a very sharp knife or a serrated bread knife, cut 5 diagonal slashes, each about ¼ to ½-inch deep, across the top of the loaf. (Alternatively, cut one long slash that extends for the length of the loaf.)
8. Transfer the dough on the parchment paper to a peel or the back of a sheet pan. Transfer the dough to the baking stone. Close the oven and reduce the temperature to 400 degrees. Bake until golden brown and the temperature is around 200 degrees** at the center, 30-40 minutes.
9. Transfer the loaves to a cooling rack and cool for at least 1 hour before slicing and serving.
*If you don’t have a baking stone, simply bake the loaf on a baking sheet at 400F for 45 minutes.
**If you don’t have an instant-read thermometer, tap the bottom of the hot baked loaf. It should sound hollow when the bread is done baking.

Posted in bread, vegetables, yeast bread | 15 Comments »

Well, I didn’t intend to choose an unpopular dessert for Tuesdays with Dorie this week. I was picturing a satiny, lemony pots de crème-type custard. Obviously I didn’t pay enough attention to the ingredients, which, with just milk, whole eggs, lemon zest, and sugar, in no way indicate that this custard would be rich. Sorry, custard-haters!

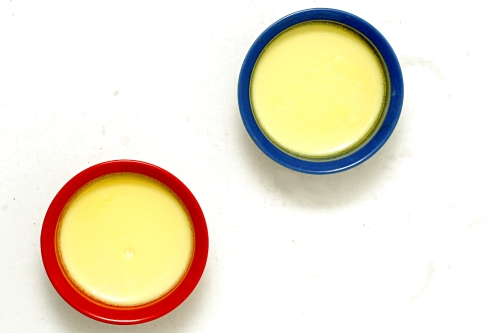
Hey, at least it was easy and didn’t use many ingredients. After the milk is steeped with lemon zest, it’s mixed into sugar and eggs, then baked in a water bath. I added a drop of lemon extract to half of my custards.
The lemon flavor was pretty tame, although it was noticeably stronger with the extract. The texture was certainly more eggy than I expected. I don’t mind the texture of classic baked custard, but I know it isn’t popular with a lot of people.

Overall, I thought the custard was light and refreshing, especially with the bit of lemon extract. It’s even a relatively healthy dessert – no butter, believe it or not! Not only that, but it was easy. So at least it was a winner in my book!

Lemon Cup Custard (from Baking: From my Home to Yours, by Dorie Greenspan)
Mine seemed to cook a little faster than Dorie indicates, so you might want to check them early.
Makes 6 servings
2¼ cups whole milk
grated zest of 1 lemon
4 large eggs
½ cup sugar
pure lemon oil or extract (optional)
Getting ready: Have six (6-ounce; ¾-cup) custard or coffee cups at hand. Put the milk and zest in a saucepan and bring just to a boil. Remove the pan from the heat, cover and set aside for 30 minutes so the zest can infuse the milk with its flavor. Reheat the milk before mixing the custard.
Getting ready to bake: Center a rack in the oven and preheat the oven to 325F. Line a roasting pan with a double thickness of paper towels and put the custard or coffee cups in the pan. Have a fine-mesh strainer at hand. Fill a teakettle with water and put it on to boil; when the water boils, turn off the heat.
In a 1-quart glass measuring cup or a heatproof bowl, whisk the eggs and sugar together until well blended. Still whisking, strain in about ¼ cup of the hot milk little by little – this will temper, or warm, the eggs so they won’t curdle. Whisking all the while, slowly strain in the remaining milk. Discard the zest remaining in the strainer. If you’d like a stronger lemon flavor – Dorie usually does – stir a few drops of lemon oil or extract into the custards. (Don’t go overboard – ⅛ teaspoon extract, less if you’re using oil, is about the most you’ll need.)
With a spoon, skim the foam off the top of the custard, then pour the custard into the cups. Very carefully slide the roasting pan into the oven, then pour enough hot water from the teakettle into the roasting pan to come halfway up the sides of the cups.
Bake the custards for 40 to 50 minutes, or until they jiggle only in the center when you tap the cups lightly. Transfer the cups to a rack and cool to room temperature, then cover and refrigerate for at least 2 hours before serving.
Serving: Serve just as is.
Storing: Well covered and away from foods with strong odors, the custards will keep in the refrigerator for up to 2 days.
Playing around:
Vanilla Cup Custard: Omit the lemon zest and oil or extract, and after the hot milk has been blended into the eggs, add 2½ teaspoons pure vanilla extract. (Dorie often adds ⅛ teaspoon pure almond extract too.) Alternatively, you can steep the milk with 1 split and scraped vanilla bean instead of using extract.
Lemon-Clove Cup Custard: Add 4 whole cloves to the milk along with the lemon zest.
Orange-Star Anise Cup Custard: Omit the lemon zest and oil or extract and add the grated zest of 1 orange and 3 points from a star anise to the milk before heating it.
Espresso-Cinnamon Cup Custard: Omit the lemon zest and oil or extract and add a cinnamon stick to the milk before heating it. Whisk 2 teaspoons instant espresso powder into the egg-sugar mixture.
Posted in custard, dessert, fruit, gluten free, healthy, tuesdays with dorie | 76 Comments »
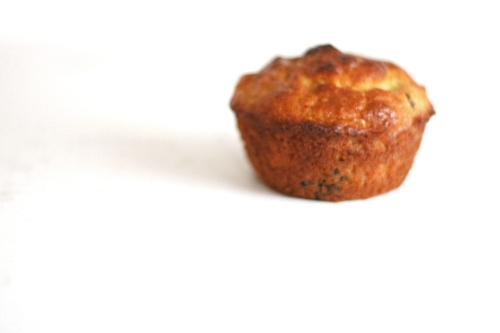
I ran a little test with these muffins. I read somewhere, at some point, that it’s best to grease just the bottom of muffin cups and not the sides. But not all recipes specify this, so I’ve never known how important it is.
This muffin recipe, which was made by Tuesdays with Dorie before I joined the group, calls for the dry and wet ingredients to be mixed separately before folding them together. Because this is standard muffin procedure, it seemed like a good candidate to test out my question about oiling the cups.

For the six muffin cups on the outside of the pan (the two outer rows), I sprayed just the bottom of the cups. For the six muffin cups on the inside of the pan (the two inner rows), I sprayed the entire cup.
 left – bottoms only; right – whole cup
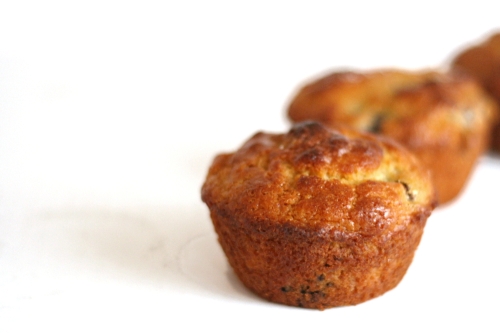
As you can see, the difference is striking. The muffins baked in the bottom-only sprayed cups rose taller and rounder. The muffins baked in the thoroughly sprayed cups have flat tops. My theory is that those muffins rose evenly on all sides, where the muffins baked in cups with unsprayed sides were held down at the sides and could only rise in the middle.
 left – whole cup sprayed; right – bottom only
Unfortunately, there’s another significant difference between each set, and that’s in how easily they came out of the pan. No one will be surprised to hear that the muffins in the completely sprayed cups were far easier to remove. The others needed a bit of prying around the edges before I could get them out of the pan, although they all came out cleanly.
For me, the extra few minutes to get the muffins out of the pan are worth it for the beautifully domed tops. (Of course now I’m wondering if there was a difference in texture. If there was, I didn’t notice.) And if the prize after carefully removing each muffin is these tender orange-scented treats studded with juicy blueberries, all the better.
 left – whole cup sprayed; right – bottom only
One year ago: Rice Pudding
Orange Berry Muffins (from Dorie Greenspan’s Baking: From my Home to Yours)
The only change I made was doubling the salt. However, you can see that my muffins got a little too dark. I know my baking pan has a dark finish, but I’ve never had problems with muffins before, so you might want to lower the oven temperature a bit, or at least check the muffins earlier than the recommended 22 minutes.
Grated zest and juice of 1 orange
About ¾ cup buttermilk
2 large eggs
3 tablespoons honey
1 stick (8 tablespoons) unsalted butter, melted and cooled
⅓ cup (2.33 ounces) sugar
2 cups (9.6 ounces) all-purpose flour
2½ teaspoons baking powder
¼ teaspoon baking soda
¼ teaspoon salt
1 cup blueberries – fresh, preferably, or frozen (not thawed)
Decorating sugar, for topping (optional)
Center a rack in the oven and preheat the oven to 400 degrees F. Butter or spray the 12 molds in a regular-size muffin pan or fit the molds with paper muffin cups. Alternatively, use a silicone muffin pan, which needs neither greasing nor paper cups. Place the muffin pan on a baking sheet.
Pour the orange juice into a large glass measuring cup or a bowl and pour in enough buttermilk to make 1 cup. Whisk in the eggs, honey and melted butter.
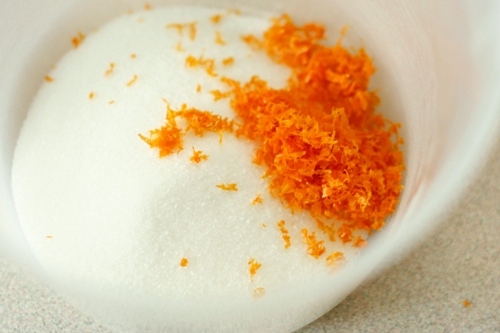
In a large bowl, rub the sugar and orange zest together with your fingertips until the sugar is moist and the fragrance of orange strong. Whisk in the flour, baking powder, baking soda and salt. Pour the liquid ingredients over the dry ingredients and, with the whisk or a rubber spatula, gently but quickly stir to blend. Don’t worry about being thorough – the batter will be lumpy and bubbly, and that’s just the way it should be. Stir in the blueberries. Divide the batter evenly among the muffin cups.
Bake for 22 to 25 minutes. If you want to top the muffins with decorating sugar, sprinkle on the sugar after the muffins have baked for 10 minutes. When fully baked, the tops of the muffins will be golden and springy to the touch and a thin knife inserted into the center of the muffins will come out clean. Transfer the pan to a rack and cool for 5 minutes before carefully removing each muffin from its mold.
Posted in bread, breakfast, fruit, quick bread, tuesdays with dorie | 20 Comments »

I would not have predicted a couple years ago that kale would become one of my favorite vegetables. Or that one of my favorite ways to eat it would be topped with an egg.
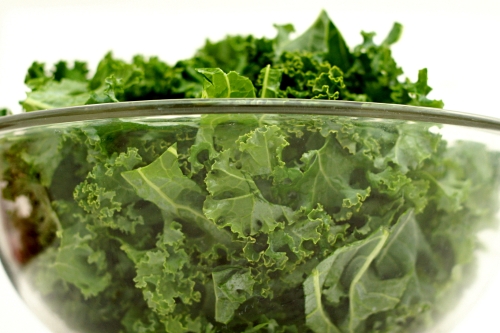
I recognize that the dark olive green color of cooked kale may appear unappetizing. Furthermore, it’s a leafy green vegetable, which we’re trained from childhood to distrust. To be honest, I still don’t even like cooked spinach – too mushy, if not in reality, then certainly in my mind.

Kale, though, retains a nice crunch after it’s cooked, because it’s much heartier than spinach. It has an earthy flavor, which I know makes it sound like it tastes like dirt, but to me, it’s more of an umami-type meaty flavor.
The problem is that the only way I had prepared kale before this was by braising it, which, although delicious, takes at least half an hour. This roasted method takes, I kid you not, only ten minutes in the oven, and the kale is just as tasty.

The texture of roasted kale is a little different from braised. Some of the leaves, those on the edges of the baking pan I suppose, were a little crispy, while some of the kale was more moist. Both textures were fine by me.
With a lovely poached egg on top, and some mustardy roasted potatoes, kale makes a delicious, hearty, easy, and healthy meal.

One year ago: Banana Walnut Pancakes
Roasted Kale (slightly reworded from Tuesday Recipe)
Serves 2, generously
1 bunch kale (about ½ pound)
extra-virgin olive oil
sea salt or kosher salt
sherry vinegar or red wine vinegar
1. Preheat the oven to 425F. Cut the stems off the kale and discard; rinse and shake the leaves dry. Stack the leaves and cut them crosswise into strips about 1 inch wide. Put the kale in a big bowl and drizzle with enough olive oil to coat well (about 2 tablespoons). Sprinkle with a generous pinch of salt, then gently toss the leaves. Spread the kale on a large rimmed baking sheet and pop it in the oven. Set the bowl aside without washing it.
2. Roast the kale until some of the leaves are tinged with brown, about 7 minutes. Remove baking sheet and stir the kale around, then put it back in the oven for another 3 minutes or so until all the leaves are starting to crisp. Immediately put the leaves back in the bowl you first tossed them in, then drizzle with another tablespoon of oil and a few splashes of vinegar. Toss kale with the tongs, taste, and add more oil, vinegar, or salt as needed. Toss again and serve right away.

Posted in favorites, gluten free, healthy, potatoes, side dish, vegetables, vegetarian, weeknight meal | 9 Comments »